Low sodium meals for seniors use fresh ingredients and basic cooking methods to keep salt intake down without making food taste bland. Most packaged foods, restaurant meals, and processed items contain far more sodium than home-cooked meals made from whole ingredients.
This article covers simple meal ideas for breakfast, lunch, and dinner that work with common foods. It explains where sodium hides in everyday foods, how to replace high-sodium ingredients with lower-sodium options, and practical ways to add flavor without relying on salt.
Key Takeaways
Most sodium comes from packaged and processed foods, not from the salt shaker
Fresh ingredients like plain meats, vegetables, and grains contain very little natural sodium
Simple ingredient swaps can cut sodium significantly without changing meal structure
Herbs, spices, citrus, and vinegar add flavor without adding sodium
Meal ideas that are easy to prepare work better than complicated low-sodium recipes
Why Lower-Sodium Meals Matter
Sodium affects fluid balance and blood pressure. Many older adults need to reduce sodium intake, but most dietary sodium comes from foods that don’t taste particularly salty.
Bread, cheese, deli meat, canned soup, frozen dinners, and restaurant meals all contain high amounts of sodium. A single serving of canned soup can contain 800 to 1,200 milligrams of sodium. Two slices of deli turkey can contain 500 milligrams. A restaurant entrée often contains more than 2,000 milligrams.
Cooking at home with fresh ingredients gives you control over how much sodium goes into each meal. This doesn’t require special recipes or hard-to-find ingredients. It means choosing foods that start with little or no sodium and building meals from there.
A lower-sodium meal uses fresh or minimally processed ingredients and limits packaged foods that contain added salt.
Fresh ingredients that are naturally low in sodium:
Plain chicken, turkey, beef, pork, or fish
Fresh or frozen vegetables without sauce
Fresh or frozen fruit
Plain rice, pasta, oats, or other grains
Dried beans and lentils
Eggs
Unsalted nuts and seeds
Common high-sodium foods to limit:
Canned soups and broths
Deli meats and hot dogs
Frozen dinners and pizza
Packaged seasoning mixes
Soy sauce and teriyaki sauce
Canned vegetables with added salt
Cheese (especially processed cheese)
Bread and rolls (varies by brand)
Salad dressings and condiments
Reading nutrition labels helps. The sodium content is listed in milligrams per serving. Compare brands when possible. Some products labeled “low sodium” or “no salt added” contain significantly less sodium than standard versions.
These meal ideas use common foods and simple preparation methods. They’re easy to adjust based on what you have available.
Breakfast Ideas
Oatmeal with fresh fruit Cook plain oats with water or milk. Top with sliced banana, berries, or diced apple. Add a sprinkle of cinnamon or a small handful of unsalted nuts.
Scrambled eggs with vegetables Scramble two eggs with diced tomatoes, bell peppers, or spinach. Serve with a slice of whole grain toast (check the label for lower-sodium bread).
Plain yogurt with fruit Use plain unsweetened yogurt instead of flavored varieties, which often contain added sodium. Add fresh berries, sliced peaches, or a drizzle of honey.
Whole grain toast with avocado Mash half an avocado on toast. Add black pepper, a squeeze of lemon, and sliced tomato.
Lunch Ideas
Grilled chicken salad Use fresh greens, sliced cucumber, cherry tomatoes, and grilled chicken breast. Make a simple dressing with olive oil, lemon juice, and black pepper.
Tuna salad without mayo Mix canned tuna (look for low-sodium or no-salt-added versions) with diced celery, a small amount of olive oil, lemon juice, and black pepper. Serve on whole grain bread or over greens.
Vegetable and bean soup Use low-sodium broth or make your own by simmering chicken bones or vegetables. Add fresh or frozen vegetables, canned beans (rinsed to remove excess sodium), and dried herbs like thyme or bay leaf.
Egg salad sandwich Hard-boil eggs and mash with a small amount of plain yogurt or olive oil. Add diced celery, black pepper, and a pinch of paprika. Serve on lower-sodium bread.
Baked chicken with roasted vegetables Season chicken breast with black pepper, garlic powder, and dried herbs. Bake at 375°F for 25 to 30 minutes. Roast vegetables like carrots, broccoli, or Brussels sprouts on a separate pan with a small amount of olive oil.
Grilled fish with steamed vegetables Grill or bake a piece of salmon, cod, or tilapia. Season with lemon juice, black pepper, and dill. Serve with steamed green beans or asparagus and a side of brown rice.
Stir-fry with fresh ingredients Use fresh chicken, shrimp, or tofu. Stir-fry with vegetables like bell peppers, snap peas, and carrots. Season with garlic, ginger, a small amount of low-sodium soy sauce, and a squeeze of lime. Serve over rice or noodles.
Pasta with homemade tomato sauce Cook whole grain pasta. Make a simple sauce by sautéing garlic in olive oil, adding canned no-salt-added tomatoes, and seasoning with basil, oregano, and black pepper. Add ground turkey or white beans for protein.
Baked pork chop with sweet potato Season a pork chop with black pepper, paprika, and a small amount of olive oil. Bake at 375°F for 20 to 25 minutes. Serve with a baked sweet potato and a side of steamed spinach.
Small changes to ingredients can reduce sodium significantly without changing the structure of a meal.
Instead of canned soup, use: Low-sodium broth or homemade broth made by simmering chicken, beef, or vegetables with water.
Instead of deli meat, use: Leftover roasted chicken or turkey, or cook a small piece of fresh chicken breast to slice for sandwiches.
Instead of regular canned vegetables, use: Fresh or frozen vegetables, or canned vegetables labeled “no salt added.”
Instead of seasoning packets, use: Your own mix of dried herbs and spices. Common options include garlic powder, onion powder, black pepper, paprika, cumin, oregano, basil, thyme, and rosemary.
Instead of soy sauce, use: Low-sodium soy sauce (use half the amount), or a mix of lemon juice and a small amount of vinegar for a tangy flavor.
Instead of regular cheese, use: Smaller amounts of cheese, or choose lower-sodium varieties. Swiss and mozzarella tend to have less sodium than cheddar or processed cheese.
Instead of salted butter, use: Unsalted butter or olive oil.
Instead of store-bought salad dressing, use: Olive oil and vinegar, or olive oil with lemon juice and black pepper.
Adding Flavor Without Salt
Fresh herbs, spices, acids, and aromatics add flavor without adding sodium.
Herbs: Fresh or dried basil, oregano, thyme, rosemary, parsley, cilantro, and dill all add distinct flavors. Fresh herbs are more potent than dried. Use about three times as much fresh herb as dried.
Spices: Black pepper, paprika, cumin, coriander, turmeric, cinnamon, and chili powder add warmth and depth. Toast whole spices in a dry pan before grinding for stronger flavor.
Citrus: Lemon, lime, and orange juice brighten flavors. Add a squeeze of citrus at the end of cooking or just before serving.
Vinegar: Balsamic, red wine, apple cider, and rice vinegar add acidity. A small amount goes a long way.
Garlic and onion: Fresh garlic and onion add savory flavor. Roasting or sautéing them brings out sweetness.
Ginger: Fresh ginger adds a sharp, warming flavor. Grate it into stir-fries, soups, or marinades.
Mustard: Dijon or whole-grain mustard adds tang. Check the label, as some mustards contain added sodium, but most contain less than other condiments.
Planning a few meals ahead makes it easier to keep sodium intake lower without extra effort each day.
Cook larger portions and use leftovers. Roast a whole chicken or a larger piece of meat. Use the leftovers for sandwiches, salads, or a second dinner. This reduces the need for high-sodium deli meat or frozen meals.
Prepare ingredients in advance. Wash and chop vegetables, cook a batch of rice or pasta, or hard-boil eggs. Store them in the refrigerator to assemble meals quickly.
Keep a few staple meals in rotation. Choose three or four simple meals you can make without a recipe. Rotate them throughout the week. This reduces decision-making and keeps grocery shopping straightforward.
Read labels when shopping. Compare sodium content across brands. Look for products labeled “low sodium,” “reduced sodium,” or “no salt added.” Even small differences add up over the course of a week.
Rinse canned foods. If you use canned beans or vegetables, rinse them under running water. This removes some of the sodium from the liquid.
Limit restaurant meals. Restaurant meals are difficult to control for sodium. When eating out, ask for sauces and dressings on the side, choose grilled or baked items instead of fried, and skip the bread basket.
Low sodium meals for seniors don’t require complicated recipes or specialty ingredients. They use fresh foods, simple cooking methods, and basic seasonings to keep sodium intake lower without making meals feel restrictive.
Start with one or two ingredient swaps or meal ideas that fit your current routine. Build from there as you find what works. Small, consistent changes make a bigger difference than trying to overhaul everything at once.
More than 20 million adults in the United States live with some form of peripheral nerve damage. That number increases significantly after age 50, when conditions like diabetes, vitamin deficiencies, and age-related changes affect nerve function. Nerve damage often shows up as numbness, tingling, burning sensations, or weakness in the hands and feet—symptoms that interfere with balance, grip strength, and everyday tasks.
Food can support nerve health, but it cannot reverse severe nerve damage on its own or replace medical treatment. Specific nutrients do support nerve repair processes, reduce inflammation, and may help slow progression of nerve-related symptoms. Understanding which foods provide the strongest nutritional support can help guide practical dietary choices.
This article explains how nutrition affects nerve health, identifies seven foods with specific benefits for nerve function, and provides clear steps for adding them to meals.
Key Takeaways
Nerve repair depends on specific nutrients: B vitamins, omega-3 fatty acids, vitamin E, and antioxidants support the cellular processes involved in nerve maintenance and repair.
Seven foods show consistent research support: Leafy greens, fatty fish, nuts and seeds, avocados, turmeric, berries, and sweet potatoes contain concentrated amounts of nerve-supporting compounds.
Diet works alongside medical care: Food supports nerve health but does not replace treatment for underlying conditions like diabetes or autoimmune disorders.
Small daily portions matter more than large amounts: Regular intake of these foods provides steady nutrient supply for ongoing nerve maintenance.
Practical meal planning makes it sustainable: Simple additions to existing meals work better than complicated diet overhauls.
How Nutrition Supports Nerve Health
Nerves are complex structures that require ongoing maintenance. Each nerve cell has a protective coating called the myelin sheath, similar to insulation on electrical wires. This coating allows nerve signals to travel quickly and efficiently. When the myelin breaks down or nerve cells become damaged, signals slow down or stop entirely, causing the symptoms people associate with nerve damage.
Several biological processes affect nerve health:
Cellular repair and regeneration: Nerve cells can repair themselves to some degree, but this requires specific building blocks—primarily B vitamins (B1, B6, B12) and folate. These nutrients support the production of new cellular material and help maintain existing nerve structures.
Myelin sheath maintenance: The protective coating around nerves consists largely of fatty compounds. Omega-3 fatty acids provide the raw materials needed to rebuild and maintain this coating. Without adequate omega-3 intake, the myelin can thin or develop gaps.
Oxidative stress protection: Free radicals—unstable molecules produced during normal metabolism—can damage nerve cells. Antioxidants like vitamin E, vitamin C, and polyphenols neutralize these free radicals before they cause harm.
Inflammation reduction: Chronic inflammation interferes with nerve repair and can worsen existing damage. Anti-inflammatory compounds found in certain foods help reduce this ongoing tissue stress.
Electrical signal transmission: Nerves communicate through electrical impulses that depend on minerals like potassium and magnesium. These minerals regulate the electrical charge inside and outside nerve cells, allowing signals to travel properly.
The body cannot store most of these nutrients for long periods. This means consistent daily intake matters more than occasional large doses. Healthy nutrition for seniors requires attention to these specific nutrient needs, especially when nerve symptoms are present.
It’s important to note what diet cannot do. Food will not reverse complete nerve death or repair severed nerves. It will not cure conditions like diabetic neuropathy without blood sugar management. What it can do is provide the nutritional foundation that allows whatever repair capacity exists to function as effectively as possible.
7 Foods That Support Nerve Health
The following seven foods contain concentrated amounts of the nutrients most directly linked to nerve health. Each offers specific benefits based on its nutrient profile.
1. Leafy Green Vegetables 🥬
Spinach, kale, Swiss chard, and collard greens provide multiple nerve-supporting nutrients in one food group. These vegetables contain high levels of B vitamins—particularly B6, B9 (folate), and some B12 in fortified varieties. They also provide magnesium, which helps regulate nerve signaling and muscle relaxation.
One specific compound found in leafy greens deserves attention: alpha-lipoic acid. This micronutrient acts as both an antioxidant and a cofactor in energy production within nerve cells. Research has examined alpha-lipoic acid supplementation for diabetic neuropathy, with some studies showing reduced pain and improved nerve function.
Practical serving: One cup of cooked spinach or two cups of raw leafy greens daily provides meaningful amounts of these nutrients. Cooking actually increases the bioavailability of some nutrients in leafy greens by breaking down cell walls.
2. Fatty Fish 🐟
Salmon, mackerel, sardines, and herring rank among the best sources of omega-3 fatty acids—specifically EPA and DHA. These long-chain fatty acids are the primary building blocks of the myelin sheath that protects nerve fibers.
Studies on omega-3 intake show benefits for nerve conduction velocity (how fast signals travel along nerves) and reduced inflammatory markers associated with nerve damage. The omega-3s also support overall brain health and may reduce age-related cognitive decline, which shares some mechanisms with peripheral nerve damage.
Practical serving: Two to three servings of fatty fish per week, with each serving being 3-4 ounces cooked. Wild-caught fish generally contain higher omega-3 levels than farmed varieties, though both offer benefits. For those who don’t eat fish, algae-based omega-3 supplements provide an alternative source of DHA and EPA.
Fatty fish also fits well into broader heart healthy foods for seniors recommendations, since omega-3s support cardiovascular function alongside nerve health.
3. Nuts and Seeds 🥜
Almonds, walnuts, flaxseeds, chia seeds, and sunflower seeds provide vitamin E, an antioxidant that specifically protects nerve cell membranes from oxidative damage. Vitamin E is fat-soluble, meaning it integrates into the fatty structures of cells where it can neutralize free radicals before they damage cellular components.
Walnuts deserve special mention because they contain both vitamin E and alpha-linolenic acid (ALA), a plant-based omega-3 fatty acid. While ALA doesn’t convert efficiently to the EPA and DHA found in fish, it still provides anti-inflammatory benefits and supports overall nerve health.
Practical serving: A small handful (about one ounce or 1/4 cup) daily provides adequate vitamin E without excessive calories. Mixing different types of nuts and seeds throughout the week ensures a broader range of nutrients.
Ground flaxseeds and chia seeds work particularly well in simple healthy meals for seniors because they can be added to yogurt, oatmeal, or smoothies without changing the meal’s basic structure.
4. Avocados 🥑
Avocados provide monounsaturated fats, potassium, magnesium, and several B vitamins. The potassium content is particularly relevant for nerve health—this mineral helps maintain the electrical charge difference across nerve cell membranes that allows signals to travel.
Low potassium levels can worsen nerve function and contribute to muscle weakness. One medium avocado contains more potassium than a medium banana, along with healthy fats that help absorb fat-soluble vitamins from other foods eaten at the same meal.
Practical serving: Half an avocado per day provides substantial nutrients without excessive calories. Avocados work well as a replacement for butter or mayonnaise, adding creaminess to sandwiches or toast while delivering nerve-supporting nutrients.
5. Turmeric 🟡
Turmeric contains curcumin, a compound with strong anti-inflammatory and antioxidant properties. Research on curcumin shows it can cross the blood-brain barrier and may support nerve regeneration by reducing inflammatory signaling molecules that interfere with repair processes.
The challenge with turmeric is bioavailability—the body doesn’t absorb curcumin efficiently on its own. Black pepper contains piperine, a compound that increases curcumin absorption by up to 2000%. This is why many turmeric supplements include black pepper extract, and why cooking with both spices together makes practical sense.
Practical serving: One teaspoon of turmeric powder daily, preferably with a pinch of black pepper and consumed with a meal containing some fat (which also improves absorption). Turmeric can be added to soups, stews, rice dishes, or smoothies. Fresh turmeric root, when available, can be grated and used similarly to ginger.
6. Berries 🫐
Blueberries, strawberries, raspberries, and blackberries contain high levels of vitamin C and polyphenols—plant compounds with antioxidant and anti-inflammatory effects. Specific polyphenols like resveratrol (found in grapes and blueberries) have shown neuroprotective effects in research studies.
Berries also provide fiber and have a relatively low glycemic impact, meaning they don’t cause rapid blood sugar spikes. This matters for nerve health because high blood sugar is one of the primary causes of nerve damage in people with diabetes or prediabetes.
Practical serving: One cup of mixed berries daily, fresh or frozen. Frozen berries retain most of their nutrient content and often cost less than fresh options. They work well in healthy snacks for elderly meal planning as a simple addition to yogurt or cottage cheese.
7. Sweet Potatoes 🍠
Sweet potatoes provide complex carbohydrates, fiber, potassium, magnesium, and several B vitamins. The purple varieties contain anthocyanins—the same antioxidant compounds found in berries. Animal studies using purple sweet potato extract have shown reduced inflammation in nerve and brain tissue, though human research is still limited.
The fiber content in sweet potatoes helps regulate blood sugar levels, preventing the spikes and crashes that can worsen nerve damage over time. Unlike white potatoes, sweet potatoes have a lower glycemic index and provide more vitamin A (as beta-carotene).
Practical serving: One medium sweet potato (about 1 cup cubed) several times per week. Baking, roasting, or steaming preserves nutrients better than boiling. The skin contains additional fiber and nutrients, so leaving it on when possible adds nutritional value.
These seven foods work together to provide comprehensive nutritional support for nerve health. They appear regularly in healthy foods for seniors recommendations because they address multiple health concerns beyond nerve function.
How to Add These Foods to Meals
Knowing which foods support nerve health only helps if they actually get eaten regularly. The following strategies focus on practical additions to existing meal patterns rather than complete diet overhauls.
Start With Breakfast
Add spinach to eggs: Scrambled eggs or omelets can include a handful of fresh spinach that wilts down during cooking. This adds B vitamins and magnesium without changing the basic meal.
Mix berries into oatmeal or yogurt: A half-cup of berries stirred into morning oatmeal or yogurt provides antioxidants and adds natural sweetness without added sugar.
Sprinkle ground flaxseed: Two tablespoons of ground flaxseed can be mixed into cereal, oatmeal, yogurt, or smoothies. It adds omega-3s and fiber with minimal taste impact.
Build Better Lunches
Make salmon salad: Canned salmon mixed with mashed avocado (instead of mayonnaise) creates a spread for sandwiches or crackers that combines omega-3s, healthy fats, and potassium.
Add nuts to salads: A quarter-cup of walnuts or sliced almonds adds crunch and vitamin E to any salad. This works with both leafy green salads and grain-based salads.
Include turmeric in soups: A teaspoon of turmeric powder stirred into lentil soup, chicken soup, or vegetable soup adds anti-inflammatory compounds without overwhelming other flavors. Add black pepper to improve absorption.
Simplify Dinner
Roast sweet potatoes as a side: Cut sweet potatoes into wedges, toss with a small amount of olive oil, and roast at 400°F for 25-30 minutes. This requires minimal preparation and pairs with most protein sources.
Bake salmon with herbs: A salmon fillet seasoned with lemon, garlic, and herbs bakes in 12-15 minutes at 400°F. This provides omega-3s with less effort than most other cooking methods.
Sauté greens with garlic: Kale, spinach, or Swiss chard sautéed in olive oil with minced garlic cooks in 5-7 minutes and works as a side dish for any meal.
Keep Snacks Simple
Prepare berry portions: Divide fresh or frozen berries into single-serving containers for the week. This makes it easier to grab a serving without measuring each time.
Pre-portion nuts: Measure one-ounce portions of mixed nuts into small containers or bags. This prevents overeating while ensuring regular intake.
Slice avocados ahead: Cut avocados in half, remove the pit, and store in the refrigerator with lemon juice on the cut surface. They’ll keep for 2-3 days and can be quickly added to meals.
These approaches work within the framework of easy healthy meals for seniors by focusing on additions rather than complicated new recipes.
Weekly Planning Approach
Rather than trying to eat all seven foods every day, a weekly rotation ensures variety and reduces meal fatigue:
Monday/Thursday: Fatty fish (salmon, mackerel, or sardines)
Tuesday/Friday: Leafy greens as main vegetable
Wednesday/Saturday: Sweet potato as starch
Daily: Small serving of nuts or seeds
Daily: Berries with breakfast or as snack
Daily: Turmeric in one meal
3-4 times weekly: Avocado
This pattern provides regular exposure to all seven foods without requiring every food at every meal. It also aligns with senior meal planning and food choices that emphasize sustainable eating patterns over restrictive diets.
Practical Shopping List
A basic weekly shopping list for these foods includes:
Fresh or frozen spinach, kale, or mixed greens (2-3 bunches or bags)
Salmon fillets or canned salmon (2-3 servings)
Mixed nuts (almonds, walnuts) and seeds (flaxseed, chia)
2-3 avocados
Ground turmeric and black pepper
Fresh or frozen mixed berries (1-2 pounds)
3-4 medium sweet potatoes
This list costs roughly $40-60 per week depending on location and whether items are purchased fresh or frozen. Frozen berries, canned salmon, and bulk nuts often provide better value without sacrificing nutritional quality.
Important Limits of Diet Alone
Food provides nutritional support for nerve health, but it has clear limits. Understanding what diet cannot do is as important as knowing what it can do.
Diet Does Not Replace Medical Treatment
Nerve damage has many causes: diabetes, vitamin B12 deficiency, autoimmune conditions, infections, toxin exposure, physical injury, and medication side effects. Each cause requires specific medical management. Eating the right foods supports nerve health but does not treat the underlying condition causing damage.
For example, someone with diabetic neuropathy needs blood sugar control through medication, insulin, or lifestyle changes. Adding nerve-supporting foods helps, but it won’t reverse neuropathy if blood sugar remains poorly controlled. Similarly, someone with B12 deficiency-related nerve damage may need high-dose B12 injections that provide far more of the vitamin than food alone can supply.
Severe Nerve Damage Requires Professional Care
When nerve damage causes significant weakness, loss of sensation, or affects balance and safety, medical evaluation is necessary. A neurologist can perform nerve conduction studies to determine the extent of damage and identify the cause. Physical therapy may be needed to maintain function and prevent falls.
Warning signs that require medical attention include:
Progressive weakness in hands or feet
Loss of sensation that affects safety (can’t feel hot/cold, can’t feel foot position)
Balance problems that increase fall risk
Sudden onset of nerve symptoms
Nerve symptoms on only one side of the body
Bowel or bladder control changes
These symptoms suggest nerve damage that needs more than dietary intervention. This aligns with broader healthy lifestyle for the elderly principles that emphasize appropriate medical care alongside healthy habits.
Realistic Expectations for Dietary Changes
Research on nutrition and nerve health shows modest but meaningful benefits. Studies of B vitamin supplementation in people with neuropathy show small improvements in pain scores and nerve conduction studies—not dramatic reversals, but measurable positive changes. Omega-3 supplementation shows similar modest benefits.
What this means practically: someone with mild tingling in their feet from early neuropathy might notice some improvement in symptoms over several months of consistent dietary changes combined with good blood sugar control. Someone with severe neuropathy and significant nerve damage is less likely to see major symptom reversal from diet alone, though proper nutrition still supports overall health and may slow progression.
The timeframe for any dietary benefit is measured in months, not days or weeks. Nerve repair is a slow process. Expecting quick results leads to disappointment and abandonment of helpful strategies.
Medication Interactions
Some foods and supplements interact with medications. Vitamin K in leafy greens can affect blood thinners like warfarin. Omega-3 fatty acids may increase bleeding risk in people taking anticoagulants. Turmeric can interact with blood thinners and diabetes medications.
Anyone taking prescription medications should discuss dietary changes with their doctor or pharmacist, especially if planning to add supplements. Whole foods in normal dietary amounts rarely cause problems, but it’s worth confirming.
Individual Variation
People respond differently to dietary changes based on genetics, existing nutrient status, medication use, and the specific cause of their nerve damage. What helps one person may not help another to the same degree. This doesn’t mean the approach is wrong—it means nerve health is complex and influenced by multiple factors.
This reality fits within the broader context of healthy eating for seniors, which emphasizes individualized approaches rather than one-size-fits-all solutions.
When to Consult a Dietitian
A registered dietitian can help in several situations:
When multiple health conditions require different dietary approaches (diabetes, kidney disease, heart disease)
When food allergies or intolerances limit options
When weight loss or gain is needed alongside nerve health support
When current medications create nutrient deficiencies
When symptoms don’t improve after several months of dietary changes
Dietitians can create personalized meal plans that address nerve health while managing other health concerns and fitting within food preferences and budget constraints.
Conclusion
The seven foods covered here—leafy greens, fatty fish, nuts and seeds, avocados, turmeric, berries, and sweet potatoes—provide nutrients that support nerve health, reduce inflammation, and help maintain normal nerve function. Each food offers distinct benefits, including B vitamins for cellular repair, omega-3s for myelin maintenance, antioxidants for protection against oxidative stress, and minerals for proper nerve signaling.
These foods work best as part of consistent eating patterns rather than occasional additions. Small daily servings provide steady nutrient supply for the slow process of nerve maintenance and repair. Practical meal planning focuses on simple additions to existing meals rather than complicated diet overhauls.
Diet supports nerve health but does not replace medical treatment for underlying conditions causing nerve damage. Blood sugar control, vitamin deficiency correction, and management of autoimmune or other medical conditions remain essential. Food provides the nutritional foundation that allows whatever repair capacity exists to function effectively.
The timeframe for any benefit is measured in months. Nerve repair happens slowly. Consistent intake of nerve-supporting foods, combined with appropriate medical care and management of underlying conditions, offers the best approach for supporting nerve health over time.
Next steps: A practical starting point is to add two or three of these foods to regular meals and build from there. Focus on options that fit easily into current eating patterns, and discuss dietary changes with a doctor if you take medications or manage other health conditions.
Seated and chair-supported yoga poses remove balance concerns and allow older adults to focus on breath, gentle stretching, and controlled movement without the risk of falling. This approach works well for those with limited mobility, joint stiffness, or anyone who prefers the security of a stable base while learning basic yoga movements.
This guide covers a small set of yoga poses for elderly beginners that prioritize seated positions and strong support. Each pose uses a sturdy chair, emphasizes comfort over depth, and keeps the range of motion small and manageable.
Key Takeaways
Seated poses eliminate balance risk and allow focus on breathing and gentle stretching
A sturdy chair with no wheels is the primary piece of equipment needed
Small movements and supported positions are safer and more sustainable than deep stretches
Breathing slowly through each pose helps maintain control and reduces strain
Stop immediately if any pose causes pain or discomfort beyond mild stretching sensation
Basic Seated Yoga Poses For Elderly Beginners
These poses form the foundation of a safe, chair-based yoga practice. Each one can be done while seated in a sturdy chair with feet flat on the floor.
Seated Mountain Pose
This is the starting position for most seated yoga work. Sit toward the front half of the chair seat with feet flat on the floor, hip-width apart. Rest hands on thighs or armrests. Lengthen the spine by sitting tall without forcing the back into an arch. Relax shoulders down and away from the ears. Breathe slowly through the nose for five to ten breaths.
This pose builds awareness of upright posture and provides a stable base for other movements. It’s also useful as a reset position between other poses.
Seated Cat-Cow
From seated mountain pose, place both hands on the thighs. On an inhale, gently arch the upper back and lift the chest slightly, allowing the shoulders to roll back. On an exhale, round the upper back and let the chin drop slightly toward the chest. Move slowly between these two positions for five to eight rounds, matching the movement to the breath.
This gentle spinal movement helps maintain mobility in the mid and upper back without requiring floor positions or deep bending. Keep the movement small and controlled.
Ankle Circles
While seated, lift one foot slightly off the floor. Slowly rotate the ankle in a circle, moving through the full range of motion that feels comfortable. Complete five circles in one direction, then five in the other. Repeat on the opposite ankle.
Ankle circles improve joint mobility and circulation in the lower legs. This is particularly useful for those who sit for long periods or experience stiffness in the feet and ankles. For more seated exercises that support circulation and joint health, chair-based routines offer additional options.
Seated Side Stretch
Sit tall in the chair with feet flat. Place the right hand on the chair seat or armrest for support. On an inhale, raise the left arm overhead or to shoulder height, depending on comfort. On an exhale, gently lean to the right, creating a mild stretch along the left side of the body. Hold for three to five breaths, then return to center and repeat on the opposite side.
Keep the movement small and avoid forcing the stretch. The goal is gentle lengthening, not maximum range of motion.
Seated Forward Reach
From seated mountain pose, place both hands on the thighs. On an exhale, slowly hinge forward from the hips, sliding the hands down the thighs toward the knees. Only go as far as feels comfortable—this may be just a few inches. Hold for three to five breaths, then slowly return to upright on an inhale.
This pose gently stretches the lower back and hamstrings without requiring a deep forward fold. Those with balance concerns or back issues should keep the range very small.
For additional guidance on starting a yoga practice safely, see our article on yoga for elderly beginners.
Supported Standing Poses Using a Chair
These poses use a chair for balance support, allowing older adults to practice standing positions without the risk of falling. A wall nearby provides additional security if needed.
Supported Mountain Pose
Stand behind a sturdy chair and place both hands on the chair back. Position feet hip-width apart with weight evenly distributed. Stand tall with shoulders relaxed and gaze forward. Hold this position for five to ten breaths, focusing on steady breathing and stable posture.
This is the safest way to practice a standing yoga pose with full support. It builds confidence in upright balance and strengthens the legs without requiring unsupported standing.
Supported Heel Raises
From supported mountain pose, keep both hands on the chair back. On an inhale, slowly rise onto the balls of the feet, lifting the heels an inch or two off the floor. Hold for one to two seconds, then lower back down on an exhale. Repeat five to eight times.
This movement strengthens the calves and improves ankle stability. Keep the movement controlled and stop if balance feels unsteady. For more ways to build leg strength safely at home, additional exercises can complement this pose.
Safety Guidelines For Yoga Poses For Elderly Beginners
Chair-based and supported yoga is generally safe, but a few clear steps steps reduce the risk of strain or injury.
Use a sturdy chair. The chair should have a flat seat, a solid back, and no wheels. Avoid folding chairs or anything that might shift during use. Place the chair on a non-slip surface or against a wall if needed.
Wear non-slip footwear or go barefoot. Socks alone can cause slipping, especially on smooth floors. Grip socks or bare feet provide better traction.
Move slowly and breathe steadily. Rushing through poses increases the chance of losing balance or pulling a muscle. Match each movement to the breath and pause between poses if needed.
Stop if pain occurs. Mild stretching sensation is normal, but sharp or sudden pain is not. If a pose causes discomfort beyond gentle tension, stop and return to a neutral position.
Keep the range of motion small. Deep stretches and large movements are not necessary for benefit. Small, controlled movements are safer and easier to sustain over time.
For those new to any form of exercise, our guide on how to start exercising after inactivity provides additional context on building a movement routine gradually.
How Often To Practice These Poses
Practicing these poses two to three times per week is enough to maintain joint mobility and build familiarity with the movements. Each session can be as short as ten to fifteen minutes.
Consistency matters more than duration. A short, regular practice is more effective than occasional longer sessions. For those interested in a structured short routine, a 10-minute yoga session can be a practical starting point.
If stiffness or discomfort increases after practice, reduce the frequency or range of motion. If improvement is noticeable, the current routine is appropriate.
What To Expect From Seated and Supported Yoga
Seated and chair-supported yoga will not produce rapid flexibility gains or dramatic strength increases. The purpose is to maintain current mobility, reduce stiffness, and provide a low-risk way to move the body regularly.
Over several weeks, most people notice slightly easier movement in the spine, hips, and shoulders. Breathing may feel more controlled, and standing balance may improve modestly due to the supported standing poses.
This type of yoga is not a substitute for other forms of exercise, but it complements activities like walking or seated strength work. It’s a useful addition to a broader movement routine, not a standalone solution.
Conclusion
Yoga poses for elderly beginners that emphasize seated and supported positions offer a practical way to maintain mobility and reduce stiffness without balance risk. The poses in this guide use a sturdy chair, require minimal equipment, and can be practiced in short sessions at home.
Start with seated mountain pose and ankle circles to build familiarity with the movements. Add seated cat-cow and side stretches as comfort allows. Use the chair back for supported standing poses only when seated work feels stable and controlled.
Move slowly, keep the range of motion small, and stop if any pose causes pain. Practicing two to three times per week is sufficient for most older adults. For those ready to explore additional beginner-friendly yoga options, our article on beginner yoga for seniors provides a broader introduction to safe practice.
Most adults over 50 can start yoga without ever getting on the floor. Yoga poses for senior beginners using simple standing and chair poses build strength, balance, and flexibility from stable positions that feel manageable from the first session.
This guide covers a practical set of beginner poses that use a chair for support or can be done while seated. The focus is on poses that improve posture, hip mobility, and balance without requiring floor work or advanced flexibility.
Key Takeaways
Chair support makes standing poses accessible by providing stability during balance work and transitions
Seated poses build flexibility and mobility in the spine, hips, and shoulders without requiring floor positions
Simple standing poses improve balance and leg strength when practiced with wall or chair support nearby
Most poses take 20-30 seconds and can be practiced individually or combined based on comfort level
Safety depends on stable support and staying within a comfortable range of motion
Standing Poses Using Chair Support
Standing poses build leg strength and balance. Using a chair for support makes these poses stable enough for beginners.
Mountain Pose (Tadasana)
Stand with feet hip-width apart, one hand resting lightly on a chair back. Distribute weight evenly across both feet. Keep knees soft, not locked. Let shoulders relax down and back.
What it does: Improves posture awareness and weight distribution. Serves as a starting position for other standing poses.
How long: Hold for 30-60 seconds while breathing normally.
Chair-Supported Warrior I
Stand facing away from a chair, hands resting on the chair back for support. Step one foot back about two feet. Keep front knee bent at a comfortable angle over the ankle. Back leg stays relatively straight.
What it does: Strengthens front leg, stretches hip flexors, improves balance with support.
How long: Hold 20-30 seconds per side.
Supported Forward Fold
Stand facing a chair seat. Place hands on the chair seat and hinge forward at the hips, keeping back relatively straight. Let the head hang naturally. Knees can stay slightly bent.
What it does: Stretches hamstrings and lower back. Releases tension in the neck and shoulders.
How long: Hold 20-30 seconds, breathing steadily.
Heel-to-Toe Balance Practice
Stand next to a wall or chair back for support. Place one foot directly in front of the other, heel touching toe. Hold the position, using support as needed. Switch feet.
What it does: Challenges balance in a controlled way. Builds confidence for walking and turning.
How long: Hold 10-20 seconds per side, or take 3-5 steps if comfortable.
Seated poses work on flexibility and mobility without requiring balance or floor positions. Use a sturdy chair without wheels and without arms if possible.
Seated Mountain Pose
Sit toward the front of the chair with feet flat on the floor, hip-width apart. Place hands on thighs. Sit up tall without forcing the spine straight. Relax shoulders down.
What it does: Establishes good seated posture. Serves as a starting point for other seated poses.
How long: Hold for 30-60 seconds while focusing on steady breathing.
Seated Twist
Sit in seated mountain pose. Place right hand on outside of left knee. Place left hand on the chair behind you or on the chair seat. Gently rotate torso to the left. Keep hips facing forward. Repeat on the other side.
What it does: Increases spinal rotation. Releases tension in the mid-back.
How long: Hold 20-30 seconds per side.
Seated Side Stretch
Sit tall in the chair. Raise right arm overhead. Lean gently to the left, feeling a stretch along the right side. Keep both hips on the chair. Repeat on the other side.
What it does: Stretches the sides of the torso and shoulders. Improves side-to-side flexibility.
How long: Hold 15-20 seconds per side.
Seated Forward Fold
Sit toward the front of the chair with feet flat. Hinge forward at the hips, letting the torso fold over the thighs. Arms can hang down or rest on thighs. Keep the fold gentle and comfortable.
What it does: Stretches the lower back and hamstrings. Releases tension in the neck.
How long: Hold 20-30 seconds.
Ankle Circles
Sit tall in the chair. Lift one foot slightly off the floor. Rotate the ankle slowly in one direction, then the other. Repeat with the other foot.
What it does: Improves ankle mobility and circulation in the lower legs.
How long: 5-10 circles in each direction per foot.
Yoga poses for senior beginners work best when practiced with attention to stability and comfort. Here’s how to set up a safe practice.
Use Stable Support
Choose a sturdy chair without wheels
Place the chair on a non-slip surface or against a wall
Keep a wall within arm’s reach during standing poses
Test the chair’s stability before relying on it for balance
Stay Within Comfortable Range
Move slowly into each pose
Stop at the point where you feel a gentle stretch, not pain
Keep breathing steady and natural throughout
Skip any pose that feels unstable or uncomfortable
Practice Controlled Transitions
Move between poses slowly and deliberately
Use chair or wall support when changing positions
Take a breath or two between poses if needed
Sit down immediately if you feel unsteady
Start With Short Sessions
Begin with 5-10 minutes and 3-5 poses. Add more poses or hold times as comfort increases. Practicing 3-4 times per week builds familiarity without overloading joints or muscles.
Common Questions About Yoga Poses For Senior Beginners
Do I need a yoga mat? Not for these poses. A sturdy chair and non-slip floor surface are sufficient. A mat can be used under the chair for extra grip if the floor is slippery.
How often should I practice? Three to four times per week allows time for practice and recovery. Daily practice is fine if poses feel comfortable and don’t cause soreness.
What if I can’t reach as far as shown? Work within your current range. Flexibility improves gradually with regular practice. Using props like a strap or towel can help bridge the gap in reaching poses.
Should I feel sore after practicing? Mild muscle awareness is normal when starting. Sharp pain, joint discomfort, or soreness lasting more than a day means the pose was too deep or held too long.
Can I combine these with other exercises? Yes. These poses work well alongside balance exercises or strength exercises. Practice yoga on different days or after other exercise sessions.
Building a Simple Practice Routine
These poses can be practiced individually or combined into a short sequence. A basic routine might include:
Seated mountain pose (1 minute)
Seated twist (30 seconds each side)
Seated side stretch (20 seconds each side)
Mountain pose with chair support (30 seconds)
Supported forward fold (30 seconds)
Heel-to-toe balance practice (20 seconds each side)
This takes about 6-8 minutes. Add or remove poses based on time and comfort level.
Yoga poses for senior beginners using simple standing and chair poses provide practical ways to improve flexibility, balance, and strength from stable positions. These poses require minimal equipment and can be practiced at home with a sturdy chair and clear space.
Start with 3-5 poses that feel manageable. Practice 3-4 times per week. Use chair or wall support whenever needed. Stay within a comfortable range of motion and move slowly between poses.
Most adults over 50 can begin practicing these poses immediately. The key is using adequate support and working within current ability rather than pushing toward an ideal position.
Most adults over 50 who consider yoga assume they need prior flexibility or special equipment. Neither is true. Yoga for senior beginners works with the body as it is, using simple movements that support balance, joint mobility, and breathing control without requiring floor work or complicated positions.
This guide explains what yoga for senior beginners involves, what to prepare, and how to begin a short, practical sequence at home or in a beginner class.
Key Takeaways
Yoga for senior beginners focuses on supported movements, breathing, and comfortable range of motion rather than flexibility goals
A chair, wall, or countertop provides stability for standing poses and helps with safe transitions
A basic starter practice includes seated posture work, gentle reaching, simple spinal movement, and supported balance
Sessions can start at 10–15 minutes and build gradually based on comfort and response
Stop for sharp pain, dizziness, or shortness of breath, and move within a range that feels stable
What Yoga For Senior Beginners Includes
Yoga for senior beginners uses slow, controlled movements combined with steady breathing. The practice emphasizes posture, balance, and joint mobility rather than deep stretching or advanced poses.
Core elements:
Seated work: posture alignment, gentle twists, and shoulder or neck movement while sitting in a chair
Supported standing: balance poses using a chair back or wall for stability
Breathing focus: slow, even inhales and exhales coordinated with movement
Gentle transitions: moving between positions without rushing or sudden shifts
The practice does not require getting onto the floor. Chair-based and standing options allow older adults to participate without strain. For those interested in a broader introduction to starting movement after a long break, how to start exercising for seniors covers safe first steps.
Getting Ready: What a Beginner Needs
Yoga for senior beginners requires minimal equipment. Most items are already available at home.
Basic setup:
Sturdy chair: one without wheels, with a straight back and stable base
Comfortable clothing: loose or stretchy pants and a shirt that allows shoulder movement
Flat, non-slip surface: a yoga mat, carpet, or any stable floor area
Wall or countertop: for additional support during standing poses
Water nearby: to sip between movements
Shoes are optional. Bare feet or non-slip socks work well. Avoid thick-soled shoes that reduce balance feedback.
Class or home practice:
Beginner yoga classes designed for seniors provide guided instruction and group pacing. Many community centers, senior centers, and studios offer chair yoga or gentle yoga sessions. Home practice allows flexibility in timing and pace. Online videos or printed guides can support home sessions, though initial instruction from a qualified teacher helps establish safe form.
A Simple Starter Sequence for Yoga for Senior Beginners
This short sequence introduces basic movements in a safe order. Each position should feel stable and controlled. Hold each pose for 3–5 slow breaths unless otherwise noted.
1. Seated posture (chair)
Sit toward the front edge of the chair with feet flat on the floor, hip-width apart. Rest hands on thighs. Lengthen the spine without forcing an arch. Relax shoulders down and back. Breathe slowly and evenly for 5–6 breaths.
2. Seated side reach
From seated posture, place the right hand on the chair seat beside the hip. Inhale and reach the left arm up and over to the right, creating a gentle side bend. Keep both hips on the chair. Hold for 3 breaths, then return to center. Repeat on the opposite side.
3. Seated spinal twist
Sit upright in the chair. Place the right hand on the outside of the left knee and the left hand on the chair back or armrest. Inhale to lengthen the spine, then exhale and gently twist to the left. Keep both hips facing forward. Hold for 3 breaths, return to center, and repeat on the opposite side.
4. Supported standing balance
Stand beside the chair with the right hand resting lightly on the chair back. Feet should be hip-width apart. Shift weight onto the left foot and slowly lift the right foot a few inches off the floor. Hold for 3–5 breaths, then lower. Repeat on the opposite side. This movement supports everyday balance and can be expanded with other balance exercises for seniors.
5. Standing forward fold (supported)
Stand facing the chair with both hands resting on the chair back. Step back so the arms are extended. Hinge forward at the hips, keeping the back flat and knees slightly bent. Let the head hang naturally. Hold for 3–5 breaths, then walk the feet forward and return to standing.
6. Gentle standing side bend
Stand with feet hip-width apart, chair nearby for support if needed. Place the right hand on the right hip. Inhale and reach the left arm up, then exhale and bend gently to the right. Hold for 3 breaths, return to center, and repeat on the opposite side.
7. Seated rest
Sit back in the chair with hands resting on thighs. Close the eyes or soften the gaze. Breathe slowly and evenly for 5–6 breaths.
This sequence takes 10–15 minutes. Repeat 2–3 times per week to start, adding sessions as comfort improves.
How to Practice Safely
Safety in yoga for senior beginners depends on pacing, support, and attention to body signals.
Key safety points:
Use support: keep a chair, wall, or countertop within reach during standing poses
Move slowly: avoid quick transitions or sudden shifts in position
Stay within comfortable range: stretch or reach only as far as feels stable, not to the point of strain
Breathe steadily: hold the breath signals tension; keep breathing slow and even
Stop for pain: sharp pain, dizziness, or shortness of breath means stop and rest
Common adjustments:
Tight hips or knees: sit fully in the chair rather than perching on the edge
Limited shoulder mobility: reduce the height of arm reaches or skip overhead movements
Balance concerns: keep both hands on the chair back during standing poses
For those who prefer seated movement throughout the session, chair exercises for seniors offer additional options.
Building a Routine
Consistency matters more than session length. A short practice done regularly provides more benefit than occasional longer sessions.
Suggested schedule:
Week 1–2: 10 minutes, 2 times per week
Week 3–4: 15 minutes, 2–3 times per week
Week 5+: 15–20 minutes, 3 times per week
Add variety by rotating through different sequences or incorporating other gentle exercises for seniors. Yoga pairs well with walking, strength work, or other low-impact activities.
When to Seek Guidance
A qualified yoga instructor can provide personalized adjustments and answer questions about form. Look for instructors with training in senior yoga, adaptive yoga, or chair yoga. Many offer private sessions or small group classes.
Situations that benefit from direct instruction:
Starting yoga after a fall, surgery, or injury
Managing arthritis, osteoporosis, or chronic pain
Uncertainty about proper alignment or breathing technique
Interest in progressing to more varied poses
Community centers and senior centers often provide affordable beginner classes. Online platforms offer live or recorded sessions, though in-person guidance helps establish safe habits early.
Conclusion
Yoga for senior beginners offers a practical way to support balance, joint mobility, and breathing control through simple, supported movements. The practice does not require prior flexibility, floor work, or special equipment beyond a sturdy chair and comfortable clothing.
Start with the basic sequence provided, moving slowly and using support as needed. Practice 2–3 times per week, gradually increasing session length as comfort improves. Stop for sharp pain or dizziness, and adjust movements to match current ability rather than forcing a specific range.
Consistency builds familiarity and confidence. Over time, the movements become easier and the benefits more noticeable in everyday tasks that require balance, reaching, or bending.
Daily activities for seniors are practical ways to stay active through everyday tasks like housework, errands, gardening, and social outings rather than formal exercise routines. These activities build movement naturally into the day, support strength and independence, and reduce the need for structured workouts while keeping joints mobile and muscles engaged.
Key Takeaways
Household tasks count as movement – vacuuming, dishes, laundry, and tidying keep you active without feeling like exercise
Errands and outings add steps – grocery shopping, library visits, and appointments naturally increase daily activity
Gardening and yard work build strength – planting, weeding, and watering engage multiple muscle groups safely
Social activities encourage movement – walking with friends, community events, and group hobbies combine connection with activity
Short mobility breaks prevent stiffness – standing, stretching, and walking between tasks maintain comfort throughout the day
Consistency matters more than intensity – small amounts of movement spread across the day support healthy aging better than occasional bursts
Adjust for energy and weather – indoor options and flexible pacing keep movement sustainable year-round
What Counts as Daily Activities for Seniors?
Daily activities for seniors are any routine tasks or hobbies that involve movement, from cleaning and cooking to walking the dog or tending plants. These activities support mobility and balance without requiring gym equipment or structured programs.
The goal is to recognize that movement already exists in your day. When you carry groceries, fold laundry, or walk to the mailbox, you’re strengthening muscles and keeping joints flexible. This approach works especially well if formal exercise feels intimidating or if you’re restarting after a long break.
Common categories include:
Household chores (sweeping, mopping, making beds, organizing)
Meal preparation (chopping, stirring, reaching for ingredients)
Errands and appointments (walking through stores, parking farther away)
Yard work and gardening (raking, planting, watering)
Social outings (visiting friends, attending community events)
Hobby-based movement (crafts, light woodworking, arranging flowers)
These activities fit naturally into everyday life and don’t require special clothing, schedules, or motivation beyond getting things done. For more structured options, see our guide to home exercise routines for seniors.
How Do Household Tasks Support Staying Active?
Household tasks provide consistent, functional movement that builds strength and endurance while accomplishing necessary work. Activities like vacuuming, washing dishes, and folding laundry engage core muscles, improve balance, and keep joints moving through natural ranges of motion.
Effective household activities:
Vacuuming and sweeping – engages arms, shoulders, and legs; improves balance through weight shifting
Washing dishes – standing time strengthens legs; reaching and scrubbing work shoulders and hands
Making beds – bending, reaching, and tucking build flexibility and core stability
Laundry – carrying baskets, reaching into machines, and folding involve full-body movement
Organizing closets or cabinets – reaching, squatting, and sorting improve mobility and grip strength
Dusting and wiping surfaces – arm movements maintain shoulder flexibility
Pacing tips:
Break larger tasks into shorter sessions. Vacuum one room, rest, then move to the next. Alternate between standing and sitting tasks to avoid fatigue. If balance is a concern, keep one hand on a counter or use a sturdy cart for support.
Common mistake: Rushing through tasks increases injury risk. Move at a comfortable pace and focus on good posture rather than speed.
What Errands and Outings Add Movement to Your Day?
Errands and outings naturally increase daily steps and provide opportunities for walking, standing, and navigating different environments. Grocery shopping, library visits, post office trips, and medical appointments all contribute to staying active as you age.
Movement-friendly errands:
Grocery shopping – walking aisles, reaching for items, pushing a cart (provides stability and light resistance)
Library or bookstore visits – browsing shelves, carrying books, walking between sections
Post office or bank trips – standing in line, walking to and from the car
Medical appointments – walking through parking lots and hallways
Window shopping or mall walking – climate-controlled environment, flat surfaces, places to rest
How to maximize benefit:
Park farther from entrances when safe and comfortable. Take stairs instead of elevators if balance allows. Carry lighter bags in each hand rather than one heavy bag to distribute weight evenly. Use a rolling cart for heavier items to reduce strain.
Choose X if: You have limited mobility – focus on shorter trips and use mobility aids without hesitation. Movement still counts even with assistance.
Gardening and yard work engage multiple muscle groups through digging, planting, weeding, watering, and raking. These activities improve grip strength, leg stability, and core engagement while providing fresh air and mental satisfaction.
Beneficial gardening tasks:
Planting and weeding – squatting and kneeling work leg muscles; pulling weeds strengthens hands and forearms
Watering plants – carrying watering cans or managing hoses builds arm and shoulder strength
Raking leaves – full-body movement improves cardiovascular endurance and coordination
Pruning and trimming – reaching and gripping maintain upper body flexibility
Container gardening – raised beds or pots reduce bending while still providing movement
Safety considerations:
Use a garden stool or kneeling pad to reduce strain on knees and back. Take frequent breaks to stand and stretch. Wear supportive shoes with good traction. Keep tools within easy reach to avoid overextending.
Edge case: If bending is difficult, container gardens at waist height provide the same benefits without the strain. Vertical gardening and raised beds work well for those with balance concerns.
Social activities that involve walking, standing, or light physical participation combine connection with movement. Group outings, community events, and activities with friends or family provide motivation and accountability while supporting healthy aging.
Movement-rich social options:
Walking with friends or neighbors – regular walking partners increase consistency
Community center classes – gentle yoga, tai chi, or dance provide structure and social interaction
Volunteering – library work, food banks, or community gardens involve standing and light activity
Group hobbies – birdwatching, photography walks, or garden clubs combine interests with movement
Family activities – playing with grandchildren, attending local events, or exploring parks
Pet care – walking a dog provides daily routine and outdoor time
Why social movement works:
Scheduled activities with others create accountability. Conversation makes movement feel less like work. Shared experiences provide mental engagement alongside physical benefits.
Choose X if: You prefer solo activity – that’s fine. The key is finding what you’ll do consistently, whether alone or with others.
For those looking to add more intentional movement, our 5-minute workout for seniors offers quick options that complement daily activities.
How Do Short Mobility Breaks Prevent Stiffness?
Short mobility breaks between activities prevent stiffness, maintain circulation, and reduce discomfort from prolonged sitting or standing. These breaks involve simple movements like standing, stretching, or walking for 1-3 minutes every 30-60 minutes.
Effective mobility break ideas:
Stand and march in place for 30 seconds
Walk to another room and back
Roll shoulders forward and backward 5 times each direction
Gently twist torso left and right while seated
Stand and reach arms overhead, then relax
Walk around the house or yard once
Shift weight from foot to foot while standing
When to use breaks:
During TV commercials, between household tasks, after reading or computer time, or whenever you notice stiffness. Set a timer if you tend to lose track of time.
Common mistake: Waiting until you’re already stiff or sore to move. Prevention is easier than recovery.
How Do You Adjust Activities for Energy and Weather?
Adjusting activities for energy levels and weather ensures movement remains consistent and sustainable year-round. Indoor alternatives, flexible pacing, and realistic expectations prevent all-or-nothing thinking.
Energy adjustments:
High energy days – tackle bigger tasks like vacuuming, yard work, or longer errands
Medium energy days – focus on lighter tasks like dishes, folding laundry, or short walks
Low energy days – choose seated tasks, simple meal prep, or brief mobility breaks
Rest when needed – some days require rest; movement can resume the next day
Weather alternatives:
Hot or cold days – indoor activities like organizing, cooking, or mall walking
Rainy days – household tasks, indoor hobbies, or chair-based movement
Nice weather – prioritize outdoor activities like gardening, errands, or walks
Pacing strategies:
Work in 10-15 minute blocks with rest between. Alternate between active and seated tasks. Listen to your body and adjust intensity based on how you feel, not what you think you should do.
The goal is consistency over time, not perfection each day. Small amounts of movement add up, and staying active as you age depends on sustainable habits rather than extreme effort.
Conclusion
Daily activities for seniors provide practical, sustainable ways to stay active through everyday tasks rather than formal exercise programs. Household chores, errands, gardening, social outings, and short mobility breaks all contribute to strength, balance, and independence when done consistently.
Movement matters most when it fits naturally into your life. The activities you already do count, and small adjustments—like parking farther away, taking stairs when possible, or adding brief stretches between tasks—build over time.
Next steps:
Identify 2-3 daily tasks you already do that involve movement
Add one new activity this week (a short walk, extra household task, or social outing)
Set a reminder for mobility breaks during long sitting or standing periods
Adjust intensity and duration based on energy and comfort
Track what you do to recognize progress and build consistency
Healthy aging depends on realistic, everyday movement more than intense workouts. Start where you are, use what you have, and focus on what you can sustain.
FAQ
What are the best daily activities for seniors who are inactive? Start with household tasks like washing dishes, making beds, or light tidying. These activities provide gentle movement without feeling like exercise. Add short walks to the mailbox or around the house, and gradually increase duration as comfort improves.
How much daily activity do seniors need? Aim for 20-30 minutes of total movement spread throughout the day, but any amount helps. This can include 10 minutes of household tasks, a 10-minute walk, and several short mobility breaks. Consistency matters more than hitting a specific number.
Can household chores replace exercise for seniors? Household chores provide valuable functional movement and can meet basic activity needs, especially for those restarting after inactivity. For additional strength and balance work, consider adding chair exercises or short workouts 2-3 times per week.
What activities help with balance and fall prevention? Activities that involve weight shifting and standing work improve balance: vacuuming, gardening, walking on varied terrain, and navigating stairs (with support). Social activities like group walks or tai chi also help. See our guide to balance exercises for seniors for more options.
How do you stay active indoors during bad weather? Focus on household tasks like organizing closets, cooking, cleaning, or doing laundry. Walk laps around your home, use stairs if available, or try mall walking. Indoor hobbies like arranging flowers or light woodworking also keep you moving.
What if daily tasks cause pain or fatigue? Break tasks into smaller chunks with rest between. Use tools like long-handled reachers, rolling carts, or garden stools to reduce strain. Adjust your approach rather than avoiding movement entirely. If pain persists, consult a healthcare provider.
Are errands enough exercise for seniors? Errands contribute to daily movement but work best when combined with other activities. Walking through stores, carrying light bags, and navigating parking lots all help, but adding household tasks, gardening, or intentional walks provides more complete movement.
How often should seniors take mobility breaks? Every 30-60 minutes during prolonged sitting or standing. Stand, stretch, or walk for 1-3 minutes to prevent stiffness and maintain circulation. Set a timer or use natural transitions like TV commercials or between tasks.
What activities build strength without gym equipment? Carrying groceries, laundry, or watering cans builds arm strength. Squatting to weed gardens or pick up items strengthens legs. Vacuuming, mopping, and raking engage core and upper body. These functional movements support muscle strengthening naturally.
Can gardening replace a workout routine? Gardening provides excellent functional movement and can meet many activity needs, especially for strength and flexibility. For comprehensive fitness, consider adding balance work and brief cardio like walking. Gardening works well as a primary activity for those who enjoy it.
How do you stay consistent with daily activities? Choose activities you already need to do or genuinely enjoy. Schedule errands or social outings regularly. Use reminders for mobility breaks. Track what you do to see progress. Focus on small, sustainable habits rather than dramatic changes.
What activities are safe for seniors with limited mobility? Seated tasks like folding laundry, meal prep, or organizing work well. Use a rolling walker or cart for support during standing tasks. Container gardening at waist height, short walks with assistance, and seated exercises all provide safe movement options.
A senior chair exercise routine built around seated movement follows a simple three-part structure: a brief warm-up to prepare joints and circulation, a main section targeting upper body, core, and lower body in turn, and a short cool-down with gentle stretches. This structure keeps movement safe, organized, and realistic for anyone who needs or prefers to stay seated throughout their routine.
Key Takeaways
Seated chair routines follow a warm-up, main work, cool-down pattern that takes 10–20 minutes total
The main section moves through body regions (arms and shoulders, core and back, legs and ankles) rather than jumping around
A sturdy chair without wheels, placed on a non-slip surface, is the only equipment required
Modifications let you adjust range of motion, speed, and support level based on how you feel that day
Seated routines work well for limited standing tolerance, balance concerns, or days when energy is lower
Consistency matters more than intensity—short, regular sessions build strength and mobility over time
Chair-based movement supports independence by maintaining joint mobility, circulation, and functional strength
What Is a Senior Chair Exercise Routine?
A senior chair exercise routine is a structured series of seated movements designed to maintain mobility, circulation, and basic strength without requiring standing or floor work. The routine uses a sturdy chair as both support and equipment, making movement accessible when balance, stamina, or joint discomfort limits other options.
These routines focus on gentle, controlled movements through comfortable ranges of motion. The structure keeps sessions organized and helps build consistency—two factors that matter more than intensity when the goal is healthy aging and staying independent.
Who benefits most: Adults who prefer seated activity, those restarting after a break, anyone with limited standing tolerance, and people looking for a low-barrier way to move daily. Also useful on lower-energy days or as a complement to other home exercise routines for seniors.
Common mistake: Skipping the structure and doing random movements. A clear routine pattern makes it easier to remember, track progress, and stay consistent.
How Do You Set Up Safely for Seated Chair Exercises?
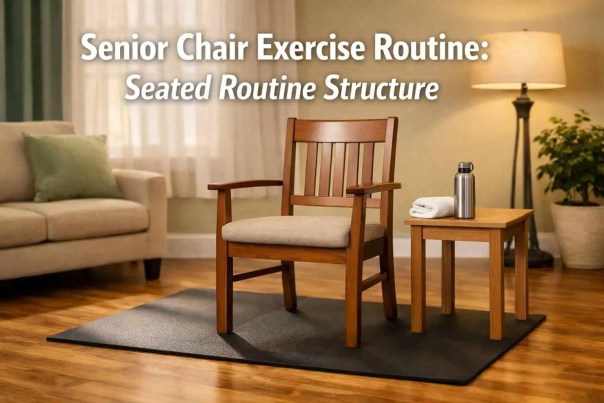
Start with a sturdy chair that has a solid seat, firm back support, and no wheels. Armless chairs work best because they allow free arm movement, but chairs with arms are fine if you need extra support getting in and out.
Setup checklist:
Place the chair on a non-slip mat or against a wall for stability
Sit toward the front half of the seat with feet flat on the floor, hip-width apart
Keep your back straight but not rigid—imagine a string gently lifting the top of your head
Position a small table or surface nearby for water and any props (towel, light weights if used later)
Wear comfortable, non-restrictive clothing and supportive shoes with grip
Choose a chair with arms if: You need hand support to sit down or stand up, or if balance feels unsteady even while seated. Choose armless if you want more freedom for upper body and side movements.
The warm-up prepares joints and increases circulation before the main work begins. This takes 2–4 minutes and uses small, gentle movements that gradually increase range of motion.
Typical warm-up movements:
Neck rolls: Slowly tilt head side to side, then gently roll chin toward chest and back to center
Shoulder shrugs and circles: Lift shoulders toward ears, release, then roll shoulders backward in small circles
Wrist and ankle circles: Rotate wrists and ankles slowly in both directions
Seated marching: Lift knees alternately in a slow, controlled rhythm
Start with smaller ranges and slower speeds. The goal is to feel joints loosen and muscles warm slightly—not to work hard or reach your limit.
Common mistake: Rushing through the warm-up or skipping it entirely. Taking a few minutes to prepare reduces stiffness and makes the main movements feel easier.
How Is the Main Section of a Seated Routine Structured?
The main section moves through three body regions in sequence: upper body, core and back, then lower body. This structure keeps the routine organized and ensures balanced movement across major muscle groups.
Each region gets 3–5 minutes of attention, with 2–4 different movements per area. You can adjust time and repetitions based on energy and comfort.
Upper Body (Arms, Shoulders, Chest)
Sample movements:
Arm raises: Lift arms forward or out to the sides, palms facing up or down
Shoulder blade squeezes: Pull shoulder blades together gently, hold briefly, release
Arm circles: Extend arms and make small circles, gradually increasing size
Bicep curls: Bend elbows to bring hands toward shoulders, using light resistance or body weight only
Repetitions: Start with 5–8 repetitions per movement, or hold positions for 5–10 seconds. Add more reps gradually as movements feel easier.
What Should the Cool-Down Include?
The cool-down brings heart rate and breathing back to baseline and gently stretches muscles used during the main section. This takes 2–3 minutes and emphasizes slow, sustained stretches rather than active movement.
Typical cool-down stretches:
Neck stretches: Tilt head gently to each side, holding 10–15 seconds
Shoulder and chest stretch: Clasp hands behind back (or hold chair back) and gently lift chest
Seated forward fold: Hinge at hips, letting arms hang toward floor or rest on thighs
Ankle and calf stretch: Extend one leg, flex foot back, hold briefly
Hold each stretch in a comfortable position—never force or bounce. Breathe slowly and steadily throughout.
Common mistake: Skipping the cool-down or rushing through it. These final minutes help reduce stiffness later and signal to your body that the session is complete.
How Do You Modify a Seated Routine for Different Needs?
Modifications adjust range of motion, speed, support level, and duration to match current ability and comfort. The same routine structure works across a wide range of fitness levels when you personalize the details.
Modification strategies:
Smaller range: Move through less distance—lift arms halfway instead of overhead, twist torso only slightly
Slower pace: Take more time per repetition, pause between movements
Added support: Use chair arms for stability, place a cushion behind lower back, hold a wall or table edge
Fewer repetitions: Start with 3–5 reps per movement instead of 8–10
Shorter sessions: Do 10 minutes instead of 20, or split the routine into two 5-minute sessions
Choose smaller range and slower pace if: You’re restarting after a break, managing stiffness, or feeling cautious. Choose fuller range and more reps if movements feel easy and you want gradual progression.
A complete seated routine typically takes 10–20 minutes, including warm-up, main work, and cool-down. Shorter sessions (5–10 minutes) are fine when time or energy is limited—consistency matters more than duration.
Sample time breakdowns:
10-minute routine: 2-minute warm-up, 6-minute main section (2 minutes per body region), 2-minute cool-down
15-minute routine: 3-minute warm-up, 9-minute main section (3 minutes per region), 3-minute cool-down
20-minute routine: 4-minute warm-up, 12-minute main section (4 minutes per region), 4-minute cool-down
Start with the shorter end and add time gradually as the routine becomes familiar. Doing 10 minutes daily builds more strength and mobility than doing 30 minutes once a week.
What Are Common Mistakes in Seated Routine Structure?
Skipping the warm-up or cool-down: Jumping straight into main movements increases stiffness and makes the session less comfortable. Always include brief preparation and wind-down phases.
Doing too much too soon: Starting with long sessions or large ranges of motion can lead to soreness that discourages consistency. Begin conservatively and add gradually.
Holding your breath: Tension and breath-holding reduce oxygen flow and make movements harder. Breathe steadily and naturally throughout.
Ignoring discomfort signals: Sharp pain, dizziness, or unusual fatigue means stop and rest. Mild muscle effort is normal; pain is not.
Inconsistent practice: Doing a routine sporadically builds less benefit than shorter, regular sessions. Aim for 3–5 days per week minimum.
How Do You Track Progress with Seated Routines?
Progress shows up as movements feeling easier, increased range of motion, better posture during daily activities, and improved confidence. Tracking simple metrics helps you notice gradual improvements.
What to track:
Number of repetitions completed comfortably
Range of motion (how far you can reach, lift, or twist)
How you feel during and after the routine (energy, stiffness, mood)
Frequency (days per week you complete the routine)
Write down one or two notes after each session—nothing elaborate. Over weeks and months, you’ll see patterns and progress that aren’t obvious day to day.
Edge case: If progress stalls or movements feel harder, check for changes in sleep, stress, or daily activity level. Sometimes rest or adjustments outside the routine make the difference.
How often should I do a seated chair routine? Three to five days per week is a good target. Daily is fine if sessions are short and you feel good. Rest days help muscles recover and prevent burnout.
Can I do a seated routine if I have arthritis or joint pain? Yes, but start with smaller ranges and slower speeds. Gentle movement often reduces stiffness over time. Stop if any movement causes sharp pain, and consult a healthcare provider if unsure.
Do I need weights or resistance bands? No. Body weight and controlled movement provide enough challenge to start. Add light resistance later if movements feel too easy and you want progression.
What if I can’t lift my arms overhead? Lift only as high as comfortable—shoulder height or lower is fine. Range of motion often improves gradually with consistent practice.
Should I do the routine in the morning or evening? Whichever time you’ll do consistently. Some people prefer morning to reduce stiffness; others prefer afternoon or evening when joints feel looser.
Can I split the routine into shorter sessions? Yes. Two 5-minute sessions or three 5-minute sessions spread through the day work well if sitting for 15 minutes straight feels too long.
What if I feel dizzy during seated exercises? Stop immediately, sit back fully in the chair, and breathe slowly. Dizziness can result from moving too quickly, holding your breath, or standing up suddenly. If it persists, consult a healthcare provider.
How long before I notice improvements? Most people notice small changes—less stiffness, easier movement—within 2–3 weeks of consistent practice. Strength and range of motion build more gradually over months.
What if I miss several days? Start again with shorter sessions or smaller ranges. Consistency matters more than perfection. Missing a few days doesn’t erase previous progress.
Do seated routines help with balance? Indirectly, yes. Strengthening core, legs, and improving body awareness supports balance, but seated work alone won’t replace standing balance practice. Combine both when possible.
Can I do seated exercises every day? Yes, if sessions are moderate and you feel good. Listen to your body—if you feel overly tired or sore, take a rest day.
Conclusion
A senior chair exercise routine built around seated movement offers a clear, manageable structure that supports healthy aging without requiring standing, special equipment, or high intensity. The three-part pattern—warm-up, main work through body regions, cool-down—keeps sessions organized and helps build the consistency that matters most for strength, mobility, and independence.
Next steps:
Choose a sturdy chair and clear a small space
Start with a 10-minute routine: 2 minutes warm-up, 6 minutes main work (2 minutes per body region), 2 minutes cool-down
Practice 3–4 days this week, adjusting range and reps to match your comfort level
Track how movements feel and note any improvements in daily activities
Add time or repetitions gradually as the routine becomes familiar
Movement matters, and seated routines make daily movement accessible regardless of current fitness level or physical limitations. Small, consistent sessions build the strength and mobility that support independence and confidence as you age.
Senior cardio exercise routines using low-impact formats focus on raising your heart rate through steady, joint-friendly movement like walking, marching, or stepping—without jumping or pounding. These routines can be structured as continuous steady-pace sessions, gentle interval patterns, or short movement bouts spread throughout the day, all scaled to your current comfort and breathing effort.
Key Takeaways
Cardio means raising your heart rate through continuous movement that makes you breathe harder but still allows conversation
Low-impact formats protect joints by keeping one foot on the ground—no jumping, running, or high-force landings required
Steady-pace routines involve consistent effort for 10–30 minutes at a comfortable, sustainable intensity
Gentle intervals alternate short bursts of slightly harder effort with easier recovery periods
Accumulated bouts break cardio into multiple 5–10 minute sessions throughout the day
Effort level matters more than speed—use breathing and perceived exertion as your guide
Frequency ranges from 3–5 days per week depending on your starting point and recovery needs
Progression happens gradually by adding a few minutes, slightly increasing effort, or reducing rest time
What Does “Cardio” Mean for Seniors?
Cardio exercise for seniors means any continuous movement that raises your heart rate and makes you breathe harder than at rest. The goal is to challenge your cardiovascular system—your heart, lungs, and circulation—in a way that builds endurance and supports daily activities like walking to the mailbox, climbing a few stairs, or keeping up during errands.
You’re doing cardio when you can feel your breathing deepen and your heart rate increase, but you can still hold a short conversation without gasping. That’s the practical zone where healthy aging happens.
Low-impact cardio keeps one foot on the ground at all times, eliminating the jarring force of jumping or running. This protects your knees, hips, and ankles while still delivering cardiovascular benefits. Walking, marching in place, stepping side to side, and controlled stair climbing all qualify.
Forget complicated heart rate formulas. Use these simple effort cues instead:
Light effort: Breathing slightly deeper than normal. You can talk in full sentences easily. This is a warm-up or active recovery pace.
Moderate effort: Breathing noticeably harder. You can still talk but prefer shorter phrases. This is where most of your cardio time should happen.
Somewhat hard effort: Breathing hard enough that talking feels like work. You can manage a few words at a time. Use this sparingly for short intervals.
Common mistake: Starting too hard and running out of steam in the first few minutes. Begin at light effort, settle into moderate, and stay there. Consistency beats intensity every time.
If you’re restarting after a long break or managing stiffness, light effort for 5–10 minutes is a perfectly valid cardio session. Build from there.
Common Low-Impact Cardio Routine Formats for Seniors
Senior cardio exercise routines using low-impact formats typically follow one of three structures. Choose based on your schedule, energy level, and what feels sustainable.
Steady-Pace Routines
This format involves continuous movement at a consistent moderate effort for 10–30 minutes without stopping.
Best for: Building endurance, establishing a habit, outdoor walking, treadmill use.
Scaling options: Start with 10 minutes and add 2–3 minutes per week. Slow your pace if breathing becomes labored. Break into two shorter sessions if needed.
Gentle Interval Routines
Intervals alternate short periods of slightly harder effort with easier recovery periods. The contrast builds fitness without sustained high intensity.
Best for: Adding variety, improving stamina, indoor routines, breaking up monotony.
Scaling options: Shorten work intervals to 30 seconds. Lengthen recovery to 3 minutes. Reduce the number of cycles.
Accumulated Short Bouts
This format breaks cardio into multiple 5–10 minute sessions spread throughout the day. Research shows accumulated bouts deliver similar cardiovascular benefits to continuous sessions.
Example structure:
Morning: 8 minutes of marching in place or walking around the house
Midday: 10 minutes of outdoor walking or indoor stepping
Evening: 7 minutes of light-paced movement before dinner
Total time: 25 minutes across the day
Best for: Busy schedules, low energy levels, easing back into movement, avoiding prolonged effort.
Scaling options: Start with two 5-minute bouts. Add a third session when ready. Gradually extend each bout by 1–2 minutes.
Practical Movement Types for Low-Impact Senior Cardio
You don’t need a gym or special equipment. These simple movements raise your heart rate safely:
Walking (outdoor, indoor, treadmill, or around your home)
Marching in place (lift knees to a comfortable height)
Side stepping (step side to side in a controlled rhythm)
Step-ups (using a low, stable step or curb)
Stair climbing (slow, controlled, using a handrail)
Stationary cycling (recumbent or upright bike)
Choose one or two movements and use them consistently. Variety matters less than regularity.
Avoid high-impact defaults like jogging, jumping jacks, or burpees unless you’re already comfortable with them. Low-impact options deliver the same cardiovascular benefits with far less joint stress.
If standing routines feel too challenging right now, start with gentle seated exercises to build baseline strength and confidence before progressing to standing cardio formats.
How Often and How Long Should You Do Cardio?
Frequency: Aim for 3–5 days per week. Start with 2–3 if you’re new or returning after a break.
Duration per session: 10–30 minutes of actual movement time (not counting warm-up and cool-down). Beginners can start with 5–10 minutes.
Weekly total: Work toward 75–150 minutes of moderate-effort cardio per week, accumulated however it fits your life. This range supports cardiovascular health without overtraining.
Rest days matter. Take at least one or two full rest days per week to allow recovery. On rest days, light stretching or gentle mobility work is fine.
Progression timeline: Add 2–3 minutes per session every 1–2 weeks, or add one extra session per week. Don’t rush. Sustainable progress takes months, not weeks.
Senior cardio exercise routines using low-impact formats are straightforward: choose a movement that raises your heart rate, structure it as steady-pace, gentle intervals, or short accumulated bouts, and scale the effort to match your breathing and comfort. Consistency matters far more than intensity or duration.
Your next steps:
Pick one low-impact movement (walking, marching, stepping)
Choose one routine format (steady-pace, intervals, or short bouts)
Start with 5–10 minutes at light-to-moderate effort, 2–3 days this week
Add 2–3 minutes per session every 1–2 weeks
Track how you feel, not just how long you move
Movement matters. Start simple, stay consistent, and adjust as you go.
Frequently Asked Questions
What counts as low-impact cardio for seniors? Any continuous movement that raises your heart rate while keeping one foot on the ground—walking, marching in place, side stepping, stair climbing, or stationary cycling. No jumping or running required.
How hard should I breathe during cardio? Hard enough that you notice deeper breathing but can still talk in short phrases. If you’re gasping or can’t speak at all, slow down.
Can I do cardio every day? You can, but most seniors benefit more from 3–5 days per week with rest days in between. Daily light walking is fine; daily moderate-effort sessions may lead to fatigue.
How long does it take to see results? Most people notice easier breathing and better stamina within 3–4 weeks of consistent cardio. Cardiovascular improvements continue for months.
What if I can only manage 5 minutes at a time? That’s a valid starting point. Do 5 minutes, rest, and repeat later in the day. Accumulated short bouts work just as well as longer sessions.
Should I use a heart rate monitor? Not necessary. Perceived effort and breathing cues are simpler and just as effective for most seniors. Use a monitor if you prefer data, but don’t rely on it exclusively.
Is walking enough for cardio? Yes, if it raises your heart rate and breathing effort above resting levels. Brisk walking or walking on slight inclines increases intensity naturally.
What if I have knee or hip arthritis? Stick with low-impact formats, avoid steep inclines or stairs initially, and keep effort moderate. Walking on flat surfaces, marching in place, or stationary cycling are often well-tolerated.
Can I do cardio and strength training on the same day? Yes. Do cardio first if endurance is your priority, or strength first if building muscle is the focus. Either order works—choose what feels sustainable.
How do I know when to increase intensity or duration? When your current routine feels noticeably easier and you recover quickly afterward. Add 2–3 minutes or slightly increase effort, then hold that level for 1–2 weeks before progressing again.
Strong legs make everything easier. Getting up from a chair, walking to the mailbox, climbing stairs, moving around the kitchen—these everyday tasks depend on leg strength. After age 50, muscle naturally declines without regular use, but the good news is simple standing exercises done at home can rebuild and maintain the strength needed for daily life.
Leg strengthening exercises for seniors don’t require a gym membership or complicated equipment. Standing exercises performed regularly at home support mobility and balance, helping maintain independence and confidence as we age. This guide focuses on practical standing leg movements that fit into everyday routines and directly support the activities that matter most.
Key Takeaways
Standing leg exercises support everyday movements like getting up, walking, and using stairs without special equipment
Consistency matters more than intensity—doing a few exercises regularly builds strength over time
Use steady support from chairs, counters, or walls to maintain balance and build confidence safely
Start with basic movements like sit-to-stands and calf raises, then add variety as strength improves
Stop if pain or dizziness occurs and focus on controlled, comfortable movements within your current ability
Why Standing Leg Strength Matters for Daily Life
Leg strength directly affects how easily we move through the day. Weak legs make standing up harder, increase fall risk, and limit how far we can walk comfortably. Strong legs provide the foundation for balance, support body weight during movement, and reduce strain on joints.
Standing exercises build functional strength—the kind used in real life. Unlike seated movements, standing leg exercises require balance and coordination while strengthening muscles, making them more practical for everyday activities. They train the body to handle the demands of normal movement patterns.
Many people worry about balance when starting standing exercises. That concern is valid and smart. Using a sturdy chair back, kitchen counter, or wall for light support makes standing exercises safe and accessible. Support doesn’t reduce the benefit—it allows consistent practice that builds strength over time.
The muscles worked during standing leg exercises include quadriceps (front thighs), hamstrings (back thighs), glutes (buttocks), and calves. These muscle groups work together during walking, standing, and climbing. Strengthening them through simple daily movements helps maintain mobility and balance naturally.
Home Setup
Before starting this leg strengthening routine, gather a few simple items and prepare the space.
What’s needed:
One sturdy chair without wheels (kitchen or dining chair works well)
Clear floor space about 3 feet around the chair
Comfortable clothing and supportive shoes
Water nearby
Safety check:
Test the chair for stability—it should not slide or tip
Remove any rugs or objects that could cause tripping
Position the chair near a wall or counter for extra support if needed
Keep a phone within reach
The chair serves as both support and exercise tool throughout the routine. Position it where there’s good lighting and enough room to move comfortably.
Short Warm-Up
Warming up prepares the legs for movement and reduces stiffness. This takes about 3 minutes.
Seated Marching (1 minute)
Sit tall in the chair with feet flat on the floor
Lift the right knee a few inches, then lower it
Lift the left knee, then lower it
Continue alternating legs at a comfortable pace
Keep breathing naturally throughout
Ankle Circles (1 minute)
Stay seated with feet flat
Lift the right foot slightly off the floor
Rotate the ankle slowly in circles—5 times one direction, then 5 times the other
Return right foot to floor
Repeat with the left foot
Seated Knee Extensions (1 minute)
Sit with back supported
Slowly straighten the right leg until comfortable
Hold for 2 seconds, then lower
Repeat with the left leg
Alternate legs 6-8 times each
The warm-up gets blood flowing and joints moving. Take it slow and gentle—this isn’t the workout yet.
Simple Standing Leg Strengthening Exercises For Seniors
These standing movements form the foundation of practical leg strength for seniors. Each exercise supports specific daily activities and can be modified based on current ability.
Sit-to-Stand
This fundamental movement directly mirrors getting up from chairs, toilets, and beds. Stand in front of a sturdy chair with feet hip-width apart. Sit down slowly with control, then stand back up using leg strength. Keep weight centered over feet and avoid leaning too far forward.
Start with 5 repetitions and gradually increase. Use armrests for light support if needed, but try to rely more on leg strength than arm push over time. This exercise builds the exact strength pattern used dozens of times daily.
Supported Squats
Squats strengthen the entire lower body while improving balance. Stand facing a counter or sturdy table, hands resting lightly on the surface. Keep feet shoulder-width apart with toes pointing slightly outward. Bend knees and lower hips as if sitting back into a chair, then press through heels to stand.
Lower only as far as comfortable—even a small bend provides benefit. Keep knees aligned over toes and maintain an upright chest. Start with 5-8 repetitions. This movement supports activities like picking items up from low shelves or getting in and out of cars.
Calf Raises
Strong calves support walking, balance, and ankle stability. Stand near a counter or wall with feet hip-width apart. Rise up onto toes, hold briefly, then lower with control. Keep the movement smooth and steady.
Perform 10-15 repetitions. This simple exercise strengthens the muscles that push off during each walking step and helps prevent ankle rolling. Regular calf raises make walking feel easier and more stable.
Side Leg Lifts
This exercise strengthens hip muscles essential for balance and sideways stability. Stand beside a chair or counter with one hand resting on it for support. Lift the outside leg straight out to the side, keeping toes pointing forward. Lower with control.
Keep the standing leg slightly bent and avoid leaning. Lift only as high as comfortable while maintaining good posture. Perform 8-10 repetitions on each side. Strong hip muscles reduce side-to-side wobbling during walking and improve overall steadiness.
Standing Marching
Marching in place builds leg strength while practicing balance. Stand near a wall or counter for optional light support. Lift one knee toward chest, lower it, then lift the other knee. Alternate in a steady rhythm.
Lift knees only as high as comfortable. Focus on controlled movement and steady balance rather than speed or height. March for 20-30 seconds initially, gradually increasing duration. This exercise directly supports walking ability and standing exercises for seniors routines.
Step-Ups
Step-ups build stair-climbing strength. Use a low, stable step like a bottom stair or sturdy platform. Place one foot on the step, press through that heel to lift up, then step down with control. Keep a hand on a railing or wall for balance.
Start with 5 repetitions per leg using a low step. This exercise directly trains the movement pattern needed for stairs and curbs. As strength improves, the movement becomes easier and more confident.
Brief Cool-Down
Cooling down helps the body transition back to rest and reduces muscle soreness. This takes about 3 minutes.
Seated Hamstring Stretch
Sit on the front edge of the chair
Extend the right leg straight with heel on the floor, toes pointing up
Keep the left foot flat on the floor
Lean forward gently from the hips until feeling a mild stretch in the back of the right thigh
Hold 20-30 seconds
Switch legs and repeat
Standing Calf Stretch
Stand facing the chair, hands on the back for support
Step the right foot back, keeping it flat on the floor
Bend the left knee slightly
Feel the stretch in the right calf
Hold 20-30 seconds
Switch legs and repeat
Gentle Walking Walk slowly around the room for 1-2 minutes, allowing the heart rate to return to normal. Shake out the legs gently.
Making Leg Strengthening Exercises For Seniors Part of Daily Routine
Building leg strength doesn’t require hour-long workouts. Short, consistent practice works better than occasional intense sessions. Choose 3-4 exercises from the list above and perform them 3-4 times weekly.
A simple routine might include sit-to-stands, calf raises, and side leg lifts—taking less than 10 minutes total. Consistency matters more than perfection. Doing exercises regularly, even with modifications, builds strength steadily over weeks and months.
Sample Weekly Approach:
Monday, Wednesday, Friday: Sit-to-stands (5-8 reps), calf raises (10-15 reps), side leg lifts (8-10 each side)
This pattern provides regular practice without overwhelming the schedule. Adjust frequency and repetitions based on how the body feels. Some days will feel stronger than others—that’s normal and expected.
Timing exercises around daily activities helps build the habit. Perform calf raises while waiting for coffee to brew. Do sit-to-stands during commercial breaks. Practice standing marching while talking on the phone. Integrating movement into existing routines makes consistency easier.
For those new to exercise or returning after a long break, starting with just one or two movements is perfectly appropriate. Building strength after 60 happens gradually through regular practice, not dramatic effort. Add exercises slowly as confidence and ability increase.
Combining leg work with other strength exercises for seniors creates balanced fitness. Upper body and core strength also support daily function, but leg strength remains the foundation for mobility and independence.
Safety and Common Sense Guidance
Safe practice prevents injury and builds confidence. Always exercise in an open area with good lighting and stable flooring. Wear supportive shoes with non-slip soles. Keep a sturdy support within easy reach—even if not always needed, knowing it’s available reduces worry.
Safety Checklist:
✅ Clear exercise area of tripping hazards ✅ Use non-slip footwear or bare feet on non-slip surfaces ✅ Keep sturdy support (chair, counter, wall) within reach ✅ Move slowly and with control—never rush ✅ Stop immediately if pain, dizziness, or sharp discomfort occurs
Muscle fatigue and mild soreness the next day are normal when starting new exercises. Sharp pain, joint discomfort, or dizziness are not normal—stop and rest if these occur. The goal is gradual strength building, not pushing through warning signals.
Breathing naturally during exercise helps maintain steady energy. Avoid holding breath during movements. Exhale during the effort phase (standing up, lifting leg) and inhale during the easier phase (sitting down, lowering leg).
Balance concerns are common and reasonable. Using support doesn’t mean weakness—it means exercising smart judgment. As leg strength and confidence improve, reliance on support naturally decreases. Some people always use light support, and that’s completely fine. The benefit comes from doing the movement regularly, not from doing it unsupported.
For those with specific health conditions, joint replacements, or recent injuries, discussing exercise plans with a healthcare provider makes sense. They can offer personalized guidance based on individual circumstances. General standing leg exercises for seniors are safe for most people, but individual situations vary.
Conclusion
Leg strengthening exercises for seniors don’t need to be complicated or time-consuming. Simple standing movements performed regularly at home build the strength needed for everyday activities like standing up, walking, and climbing stairs. Exercises like sit-to-stands, calf raises, and supported squats directly support daily function while improving balance and confidence.
Start with a few basic exercises and practice them consistently. Use steady support as needed—there’s no rush to exercise unsupported. Strength builds gradually through regular repetition over weeks and months, not through single intense efforts.
Next Steps:
Choose 2-3 exercises from this guide that feel manageable right now
Practice them 3 times this week in a safe, clear space with support nearby
Focus on controlled movement and comfortable range rather than repetitions or intensity
Add variety or increase repetitions gradually as strength and confidence grow
Movement matters more than perfection. Staying active as you age through simple daily habits supports strength and independence for years to come. For additional guidance, explore our resources on home exercise routines designed for realistic, sustainable practice.
Strong legs support an active, independent life. Small consistent efforts add up to meaningful results over time. Start where you are, use what you have, and keep moving forward.
Foods that heal the pancreas work by reducing the organ’s workload and providing nutrients that combat inflammation. A low-fat diet with lean proteins, antioxidant-rich fruits and vegetables, and specific protective foods like garlic, sweet potatoes, and leafy greens supports pancreatic recovery. While food can’t cure a damaged pancreas, strategic dietary changes help the organ rest and reduce further damage during healing.
Key Takeaways
Low-fat eating is essential: The pancreas works harder to digest fat, so limiting fat intake reduces strain and allows inflammation to subside
Lean proteins support healing: Chicken, fish, turkey, beans, and lentils provide necessary nutrition without overtaxing the organ
Antioxidant-rich foods reduce inflammation: Blueberries, cherries, leafy greens, and cruciferous vegetables combat oxidative stress in pancreatic tissue
Specific foods offer measurable protection: Garlic reduces pancreatic cancer risk by 54%, while sweet potatoes lower risk by 50%
Probiotic foods aid digestion: Low-fat yogurt with active cultures improves digestive function and reduces cancer risk
Fiber-rich whole foods prevent complications: High-fiber options support digestion and help prevent gallstone formation
Portion control matters as much as food choice: Small, frequent meals reduce pancreatic workload better than large portions
Certain foods must be eliminated entirely: Alcohol, fried foods, butter, and processed junk food can worsen pancreatic inflammation
What Are the Top Natural Foods That Support Pancreatic Health and Healing?
The most effective foods that heal the pancreas include leafy greens, cruciferous vegetables, antioxidant-rich fruits, lean proteins, and specific protective foods like garlic and sweet potatoes. These foods reduce inflammation, provide essential nutrients, and minimize the digestive workload on your pancreas.
Leafy Greens and Cruciferous Vegetables
Spinach stands out as a pancreatic protector because it’s high in vitamin B and iron that directly protect the organ[1]. Meanwhile, broccoli contains specific compounds called flavonoids—apigenin and luteolin—that research from the University of Illinois shows can eliminate cells that might develop into pancreatic cancer[1][4].
These vegetables work best when:
Steamed or lightly cooked rather than raw (easier to digest)
Eaten in moderate portions (1-2 cups per meal)
Prepared without heavy oils or butter
Antioxidant-Rich Fruits
Blueberries, cherries, and red grapes provide powerful support for pancreatic function. Cherries contain a compound called perillyl alcohol (POH) that’s linked to cancer prevention, while the resveratrol in red grapes has been shown to kill pancreatic cancer cells[1].
Choose these fruits because they:
Deliver concentrated antioxidants without excess sugar
Can be eaten fresh, frozen, or as part of low-fat yogurt
Provide nutrients that combat free radicals and oxidative stress
Sweet Potatoes
Research from the University of California found that sweet potatoes lower the chance of pancreatic cancer by 50%[1]. Their orange color indicates high levels of protective compounds, and they have a lower glycemic index than white potatoes, making them gentler on blood sugar regulation.
Garlic
A study published by the National Cancer Institute revealed that garlic reduces pancreatic cancer risk by 54% in people who include it regularly in their diet[1]. This makes garlic one of the most protective foods available for pancreatic health.
Add garlic to your meals by:
Mincing fresh cloves into cooked dishes
Avoiding heavy garlic butter preparations
Using it to flavor lean proteins and vegetables
For more guidance on building meals around these protective foods, see our guide to healthy foods for seniors.
How Can Diet Help Repair and Regenerate Pancreatic Tissue?
Diet supports pancreatic healing primarily by reducing the organ’s workload and providing nutrients that combat inflammation. While food can’t regenerate severely damaged tissue, strategic eating allows the pancreas to rest and prevents additional damage during recovery.
Resting the Organ Through Dietary Modification
In acute pancreatitis cases, doctors often recommend a clear liquid diet or even temporary fasting to stop the production of digestive enzymes that worsen inflammation[2]. As recovery progresses, gradually introducing low-fat, easily digestible foods allows the pancreas to function without strain.
The pancreas produces enzymes specifically for fat digestion. A high-fat meal forces the organ to work much harder, potentially triggering pain and inflammation in someone with pancreatitis[2]. Experts recommend keeping fat intake low—typically under 50 grams daily for those recovering from pancreatic issues[6].
This means:
Choosing lean proteins (chicken breast, fish, turkey) over fatty cuts
Avoiding fried foods, butter, and heavy cream
Reading labels to track fat content in packaged foods
Controlling Inflammation With Antioxidants
Foods rich in antioxidants help combat free radicals and reduce oxidative stress in pancreatic tissues[3]. Leafy greens, berries, and cruciferous vegetables provide these protective compounds without adding fat or excessive calories.
Common mistake: Some people assume all “healthy fats” are fine during pancreatic recovery. Even beneficial fats from avocado, nuts, and olive oil must be carefully portioned—they still require pancreatic enzymes for digestion[2][7].
Our healthy nutrition for seniors guide offers additional strategies for building anti-inflammatory eating patterns.
What Specific Nutrients Are Most Effective for Pancreas Recovery?
The most effective nutrients for pancreatic recovery include lean protein, specific vitamins (especially B vitamins and antioxidants), fiber, and carefully controlled amounts of healthy fats. These nutrients support healing while minimizing digestive strain.
Lean Protein
Protein is essential for tissue repair and maintaining strength during recovery. The key is choosing sources that are naturally low in fat[2][6]:
Chicken breast (skinless, baked or grilled)
Fish (cod, tilapia, haddock—not fried)
Turkey (lean cuts without skin)
Beans and lentils (excellent plant-based options)
Egg whites (whole eggs in moderation)
Aim for 3-4 ounces of lean protein per meal, which provides adequate nutrition without overwhelming the pancreas.
B Vitamins and Iron
These nutrients, abundant in spinach and other leafy greens, directly protect pancreatic tissue[1]. B vitamins support cellular function and energy metabolism, while iron helps maintain healthy blood and tissue oxygenation.
Fiber
High-fiber foods support digestion and help prevent gallstone formation, which can trigger or worsen pancreatitis[3]. Good sources include:
While fat must be limited, small amounts of certain fats help absorb fat-soluble vitamins (A, D, E, and K)[2][7]. If your doctor approves, include tiny portions of:
Olive oil (1 teaspoon for cooking)
Avocado (1-2 tablespoons)
Fatty fish like salmon (small portions, once weekly)
Nuts and seeds (1 tablespoon as a snack)
Probiotics
The National Cancer Institute recommends three servings daily of fat-free or low-fat yogurt with active cultures to improve digestion and reduce pancreatic cancer risk[1]. Probiotics support gut health, which indirectly benefits pancreatic function.
Decision rule: Choose yogurt if it’s labeled “fat-free” or “low-fat” and contains “live and active cultures.” Greek yogurt provides extra protein but check the fat content carefully.
Can Certain Foods Reduce Inflammation and Promote Pancreas Healing?
Yes, specific foods that heal the pancreas work by reducing inflammation through antioxidant compounds, protective phytochemicals, and anti-inflammatory properties. These foods don’t “cure” pancreatitis but they create conditions that support recovery and prevent further damage.
Anti-Inflammatory Vegetables
Cruciferous vegetables like broccoli, cauliflower, and Brussels sprouts contain compounds that actively reduce inflammation. The flavonoids apigenin and luteolin in broccoli specifically target cells that could become cancerous[1][4].
Antioxidant Fruits
Berries deliver concentrated antioxidants that combat oxidative stress:
Blueberries: High in anthocyanins that reduce inflammation
Cherries: Contain perillyl alcohol linked to cancer prevention[1]
Red grapes: Resveratrol kills pancreatic cancer cells[1]
These fruits work best when eaten fresh or frozen, not as juice (which concentrates sugar and removes fiber).
Garlic’s Protective Effect
The 54% reduction in pancreatic cancer risk associated with regular garlic consumption makes it one of the most protective foods available[1]. Garlic contains sulfur compounds that reduce inflammation and support immune function.
Foods to Completely Avoid
Some foods actively worsen pancreatic inflammation and must be eliminated[3]:
Alcohol: Directly toxic to pancreatic tissue
Fried foods: High fat content triggers enzyme production
Butter and margarine: Pure fat that strains the organ
Processed junk food: High in fat, sugar, and inflammatory compounds
Fast food: Typically fried or high in unhealthy fats
Edge case: Some people tolerate small amounts of healthy fats better than others. Work with your doctor to determine your individual fat threshold—it varies based on the severity of pancreatic damage and stage of recovery.
What Dietary Strategies Can Help Manage and Improve Pancreatic Function?
The most effective dietary strategies for managing pancreatic function include eating small frequent meals, following a low-fat high-protein pattern, prioritizing easily digestible foods, and maintaining consistent meal timing. These approaches reduce pancreatic workload while ensuring adequate nutrition.
Small, Frequent Meals
Instead of three large meals, eat 5-6 smaller portions throughout the day[2]. This approach:
Prevents overwhelming the pancreas with large amounts of food at once
Maintains steadier blood sugar levels
Reduces the enzyme surge that large meals trigger
Makes it easier to meet nutritional needs without discomfort
The Low-Fat, High-Protein Framework
A well-balanced diet for pancreatic health includes[2][6]:
Lean proteins: 3-4 ounces per meal
Whole grains: 1/2 to 1 cup per meal
Vegetables: 1-2 cups per meal (cooked, not raw)
Fruits: 1 serving per meal or snack
Nonfat or low-fat dairy: 2-3 servings daily
Keep total fat under 50 grams daily, with most meals containing 10-15 grams or less.
Practical Meal Examples
A sample day of pancreas-friendly eating might include[5]:
Breakfast
Low-fat yogurt with blueberries and a sprinkle of granola
Slice of whole wheat toast (no butter)
Herbal tea
Mid-Morning Snack
Apple slices
Small handful of pretzels
Lunch
Grilled chicken breast (3 oz)
Steamed broccoli (1 cup)
Brown rice (1/2 cup)
Fresh cherries
Afternoon Snack
Low-fat string cheese
Whole grain crackers (5-6)
Dinner
Baked cod (4 oz)
Roasted sweet potato (1 medium)
Steamed asparagus
Small garden salad with lemon juice dressing
Evening Snack
Small bowl of berries
Meal Preparation Tips
Cooking methods: Bake, grill, steam, or poach—never fry
Seasoning: Use herbs, garlic, lemon, and spices instead of butter or oil
Portion control: Measure servings until you can estimate accurately
Advance preparation: Cook proteins and grains in batches for easy assembly
Hydration Strategy
Drink plenty of water throughout the day, but avoid drinking large amounts with meals (which can make you feel too full to eat adequate nutrition). Aim for 6-8 glasses of water daily, sipped between meals.
Common mistake: Skipping meals because you don’t feel hungry. Consistent eating helps maintain nutrition and prevents blood sugar swings, even if appetite is reduced during recovery.
How Do You Build a Sustainable Pancreas-Healing Eating Pattern?
Building a sustainable eating pattern for pancreatic health means creating simple routines you can maintain long-term, not following a restrictive temporary diet. Focus on establishing daily habits, preparing simple meals, and making gradual adjustments that fit your life.
I have created a downloadable PDF file titled Pancreas Friendly Eating Pattern Starter Template that you can download just below this section and use to track you progress.
Start With Basic Meal Templates
Create 3-4 simple meal templates you can rotate:
Template 1: Protein + Grain + Vegetable
Grilled chicken + brown rice + steamed broccoli
Baked fish + quinoa + green beans
Turkey breast + whole wheat pasta + carrots
Template 2: Soup-Based Meal
Lentil soup with whole grain crackers
Chicken and vegetable soup with brown rice
Bean and vegetable soup with whole wheat roll
Template 3: Breakfast Options
Low-fat yogurt + berries + whole grain cereal
Oatmeal + sliced banana + cinnamon
Scrambled egg whites + whole wheat toast + fruit
Build a Shopping List
Keep these staples on hand:
Proteins
Boneless, skinless chicken breast
Lean ground turkey
White fish (cod, tilapia)
Canned tuna in water
Dried lentils and beans
Egg whites or whole eggs
Vegetables
Spinach and mixed greens
Broccoli and cauliflower
Sweet potatoes
Carrots
Green beans
Asparagus
Fruits
Blueberries
Cherries
Apples
Bananas
Red grapes
Grains
Brown rice
Oatmeal
Whole wheat bread
Whole grain crackers
Quinoa
Dairy
Fat-free or low-fat yogurt
Skim milk
Low-fat string cheese
Gradual Implementation
Don’t try to change everything at once. Start with:
Week 1: Eliminate fried foods and alcohol Week 2: Switch to low-fat dairy products Week 3: Replace fatty proteins with lean options Week 4: Add more vegetables and whole grains Week 5+: Fine-tune portions and meal timing
Eating Out Strategies
Restaurant meals can fit a pancreas-friendly pattern if you:
Choose grilled, baked, or steamed preparations
Ask for sauces and dressings on the side (or skip them)
Request vegetables instead of fries
Eat half the portion and take the rest home
Avoid buffets and fried appetizers
Social Situations
When eating at friends’ homes or gatherings:
Eat a small snack beforehand so you’re not overly hungry
Focus on vegetables, lean proteins, and fruits
Politely decline fried foods and rich desserts
Bring a dish you can eat to contribute and ensure options
Tracking Progress
Keep a simple food journal for the first few weeks:
What you ate and when
Portion sizes
How you felt afterward
Any symptoms or discomfort
This helps identify patterns and foods that work well or cause problems.
Decision rule: If a food causes discomfort, bloating, or pain, eliminate it for two weeks then try reintroducing in a smaller portion. Some people tolerate certain foods better than others, even within recommended categories.
What Role Do Supplements Play in Pancreatic Health?
Supplements may be necessary for people with pancreatic insufficiency or malabsorption issues, but they should complement—not replace—a proper diet. The most common supplements for pancreatic health include pancreatic enzymes, fat-soluble vitamins, and specific nutrients that may be poorly absorbed.
Pancreatic Enzyme Replacement
When the pancreas can’t produce enough digestive enzymes, prescription enzyme supplements help digest food[8]. These are taken with every meal and snack containing fat or protein.
Fat-Soluble Vitamins
People with pancreatic insufficiency often can’t absorb vitamins A, D, E, and K properly[8]. Your doctor may recommend supplements if blood tests show deficiencies.
Other Common Supplements
Depending on individual needs:
B12: Often deficient in chronic pancreatitis
Calcium and vitamin D: Important for bone health
Multivitamin: General nutritional insurance
Probiotics: May support digestive health (discuss with your doctor)
Important cautions:
Never start supplements without discussing with your doctor
Some supplements can interact with medications
High-dose vitamins can sometimes worsen pancreatic issues
Food sources are always preferred when absorption is adequate
When supplements are most needed:
Diagnosed pancreatic insufficiency
Chronic pancreatitis with malabsorption
After pancreatic surgery
Documented vitamin deficiencies on blood tests
Focus on getting nutrients from foods that heal the pancreas first, then use supplements to fill specific gaps identified by your healthcare team.
How Long Does It Take to See Improvement With Dietary Changes?
Most people notice some improvement in symptoms within 2-4 weeks of following a pancreas-friendly diet, but full recovery depends on the severity of damage and consistency with dietary changes. Acute pancreatitis may resolve in days to weeks, while chronic pancreatitis requires long-term dietary management.
Timeline for Different Situations
Acute Pancreatitis Recovery
Days 1-3: Clear liquids only, symptoms begin improving
Days 4-7: Gradual introduction of low-fat foods
Weeks 2-4: Return to normal eating with continued fat restriction
Weeks 4-8: Most people feel significantly better with dietary compliance
Chronic Pancreatitis Management
Weeks 1-2: Initial symptom reduction with strict low-fat diet
Months 1-3: Gradual improvement in digestion and comfort
Months 3-6: Stabilization with consistent dietary management
Ongoing: Continued adherence prevents flare-ups
Factors That Affect Recovery Speed
Severity of initial damage: More severe inflammation takes longer to heal
Dietary compliance: Strict adherence speeds recovery; cheating delays it
Alcohol cessation: Continued drinking prevents healing entirely
Overall health: Other conditions can slow recovery
Age: Healing may take longer in older adults
Signs of Improvement
You’re on the right track when you notice:
Reduced abdominal pain
Less bloating and discomfort after meals
Improved appetite
Better energy levels
Normalized bowel movements
Weight stabilization (after initial loss)
When to Seek Medical Attention
Contact your doctor if:
Pain worsens despite dietary changes
You develop fever or chills
You can’t keep food down
You lose weight rapidly
Symptoms don’t improve after 2-3 weeks of dietary compliance
Realistic expectations: Pancreatic healing is gradual. Don’t expect overnight changes, but do expect steady improvement with consistent effort. Small setbacks are normal—what matters is getting back on track quickly.
For additional guidance on building sustainable health habits, see our article on healthy habits for seniors.
Frequently Asked Questions
What is the best breakfast for pancreas health?
The best breakfast for pancreatic health includes low-fat yogurt with berries, oatmeal with sliced banana, or scrambled egg whites with whole wheat toast. Avoid fatty breakfast meats, butter, and fried foods. Keep portions moderate and include protein, whole grains, and fruit.
Can you eat eggs with pancreatitis?
Yes, eggs can be part of a pancreas-friendly diet, but preparation matters. Egg whites are ideal because they’re pure protein with no fat. Whole eggs can be eaten in moderation (1-2 per day) if prepared without added fat—poached, boiled, or scrambled with cooking spray rather than butter.
Are bananas good for the pancreas?
Bananas are generally safe and beneficial for pancreatic health. They’re easy to digest, low in fat, provide natural sweetness without added sugar, and contain potassium and fiber. They work well as snacks or added to oatmeal or low-fat yogurt.
What drinks are good for pancreas health?
Water is the best choice for pancreatic health. Other good options include herbal teas, clear broth, and diluted fruit juice (in moderation). Avoid alcohol completely, limit caffeine, and skip sugary sodas and energy drinks. Drink fluids between meals rather than with meals.
Can the pancreas repair itself with proper diet?
The pancreas has limited ability to repair mild damage when given proper rest through dietary changes. A low-fat diet reduces workload and allows inflammation to subside. However, severe or chronic damage may be permanent, though proper diet prevents further deterioration and manages symptoms.
Is coffee bad for the pancreas?
Coffee in moderation (1-2 cups daily) is generally acceptable for most people with pancreatic issues, but individual tolerance varies. Avoid adding cream, whole milk, or sugar. Some people find caffeine irritating during acute flare-ups. If coffee causes discomfort, switch to herbal tea.
What vegetables should you avoid with pancreatitis?
Most vegetables are beneficial for pancreatic health. However, during acute flare-ups, avoid raw vegetables (which are harder to digest) and gas-producing vegetables like cabbage, onions, and beans if they cause discomfort. Cooked, easily digestible vegetables like carrots, green beans, and squash are better tolerated.
Can you eat chicken with pancreatitis?
Yes, chicken is an excellent protein choice for pancreatic health. Choose skinless chicken breast, and prepare it by baking, grilling, or poaching—never fried. A 3-4 ounce portion provides adequate protein without excessive fat. Avoid chicken thighs, wings, and dark meat, which contain more fat.
Are sweet potatoes better than regular potatoes for the pancreas?
Yes, sweet potatoes are significantly better for pancreatic health. Research shows they lower pancreatic cancer risk by 50%, have a lower glycemic index, and contain more protective antioxidants than white potatoes[1]. Bake or roast them without added butter or oil.
What snacks are safe for pancreatic health?
Safe snacks include fresh fruit, low-fat yogurt, whole grain crackers, pretzels, rice cakes with a thin spread of almond butter, vegetables with hummus (small amount), air-popped popcorn (no butter), and low-fat string cheese. Keep portions small and avoid fried chips, cookies, and candy.
How much fat can you eat with pancreatitis?
Most experts recommend limiting fat to 50 grams or less per day for pancreatic issues, with individual meals containing 10-15 grams or less[6]. Track fat grams by reading nutrition labels and using a food diary. Your doctor may adjust this target based on your specific situation.
Can you ever eat normally again after pancreatitis?
Many people with acute pancreatitis can return to relatively normal eating after full recovery, though they typically need to permanently limit fat intake and avoid alcohol. Those with chronic pancreatitis usually require lifelong dietary modifications. The key is finding a sustainable eating pattern that prevents symptoms while providing adequate nutrition.
Conclusion
Foods that heal the pancreas work by reducing the organ’s workload, providing anti-inflammatory nutrients, and creating conditions that support recovery. While no food can cure severe pancreatic damage, strategic dietary choices make a measurable difference in managing symptoms and preventing further harm.
The foundation of pancreatic nutrition is simple: emphasize lean proteins, vegetables, fruits, and whole grains while strictly limiting fat and eliminating alcohol and fried foods. Specific protective foods like garlic, sweet potatoes, leafy greens, and antioxidant-rich berries offer additional benefits backed by research.
Your next steps:
Start with one change this week: Eliminate fried foods and alcohol if you haven’t already
Build simple meal templates: Use the protein + grain + vegetable formula for easy planning
Stock your kitchen: Keep lean proteins, vegetables, fruits, and whole grains on hand
Eat smaller, more frequent meals: Aim for 5-6 small portions rather than 3 large meals
Track your response: Note which foods make you feel better or worse
Work with your healthcare team: Get personalized guidance based on your specific situation
Remember that healing takes time. Focus on consistency rather than perfection, and celebrate small improvements along the way. The dietary changes that support pancreatic health also promote overall wellness, helping you maintain strength, energy, and independence as you age.
To provide the best experiences, we use technologies like cookies to store and/or access device information. Consenting to these technologies will allow us to process data such as browsing behavior or unique IDs on this site. Not consenting or withdrawing consent, may adversely affect certain features and functions.
Functional Always active
The technical storage or access is strictly necessary for the legitimate purpose of enabling the use of a specific service explicitly requested by the subscriber or user, or for the sole purpose of carrying out the transmission of a communication over an electronic communications network.
Preferences
The technical storage or access is necessary for the legitimate purpose of storing preferences that are not requested by the subscriber or user.
Statistics
The technical storage or access that is used exclusively for statistical purposes.The technical storage or access that is used exclusively for anonymous statistical purposes. Without a subpoena, voluntary compliance on the part of your Internet Service Provider, or additional records from a third party, information stored or retrieved for this purpose alone cannot usually be used to identify you.
Marketing
The technical storage or access is required to create user profiles to send advertising, or to track the user on a website or across several websites for similar marketing purposes.